The redesigned PickMyTrade layout consolidates every automation tool — alert generation, account management, risk controls, and trade monitoring — into a single, streamlined workspace. Navigation has moved from a horizontal tab bar to a persistent left-side panel, but the underlying platform logic, webhook integrations, and broker connections remain unchanged. This guide covers each section of the redesigned interface and links to the full documentation for every major feature.
This is an interface overview. The trading logic, automation flow, and setup concepts covered in the existing PickMyTrade documentation all apply to the redesigned layout without modification.
What changed in the new layout? #
The redesign focuses on reducing friction in day-to-day trading operations. Four structural improvements make the biggest difference:
- A persistent left sidebar replaces the top-tab navigation, giving you direct access to every section from any page.
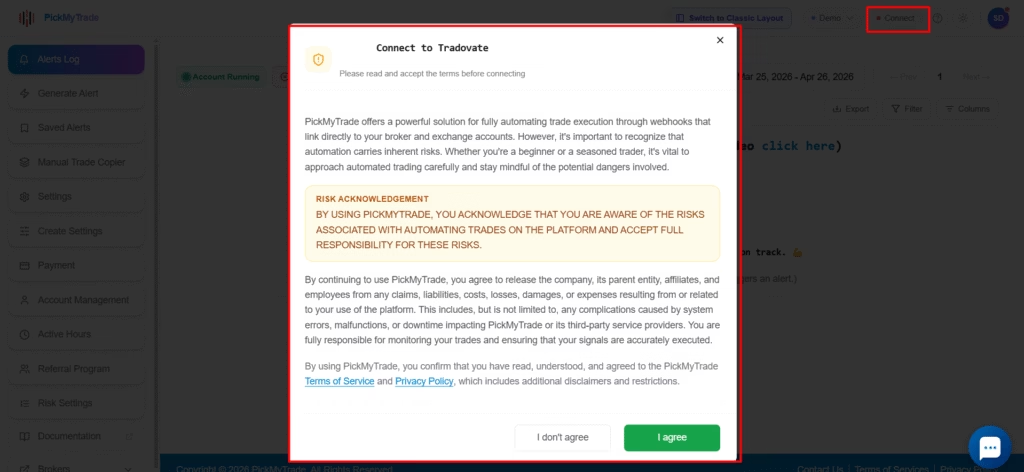
- A consolidated top bar centralizes Demo/Live mode switching, Tradovate connection, help, theme toggle, and your profile menu.
- Alert generation tools — including the token, webhook URL, save alert, and account selection — are grouped in one accessible location.
- Setup pages, account tools, risk controls, and support resources are visually separated for faster orientation.
To switch to the new layout, click Switch to New Layout in the classic interface. To revert, click Switch to Classic Layout from the top bar at any time.
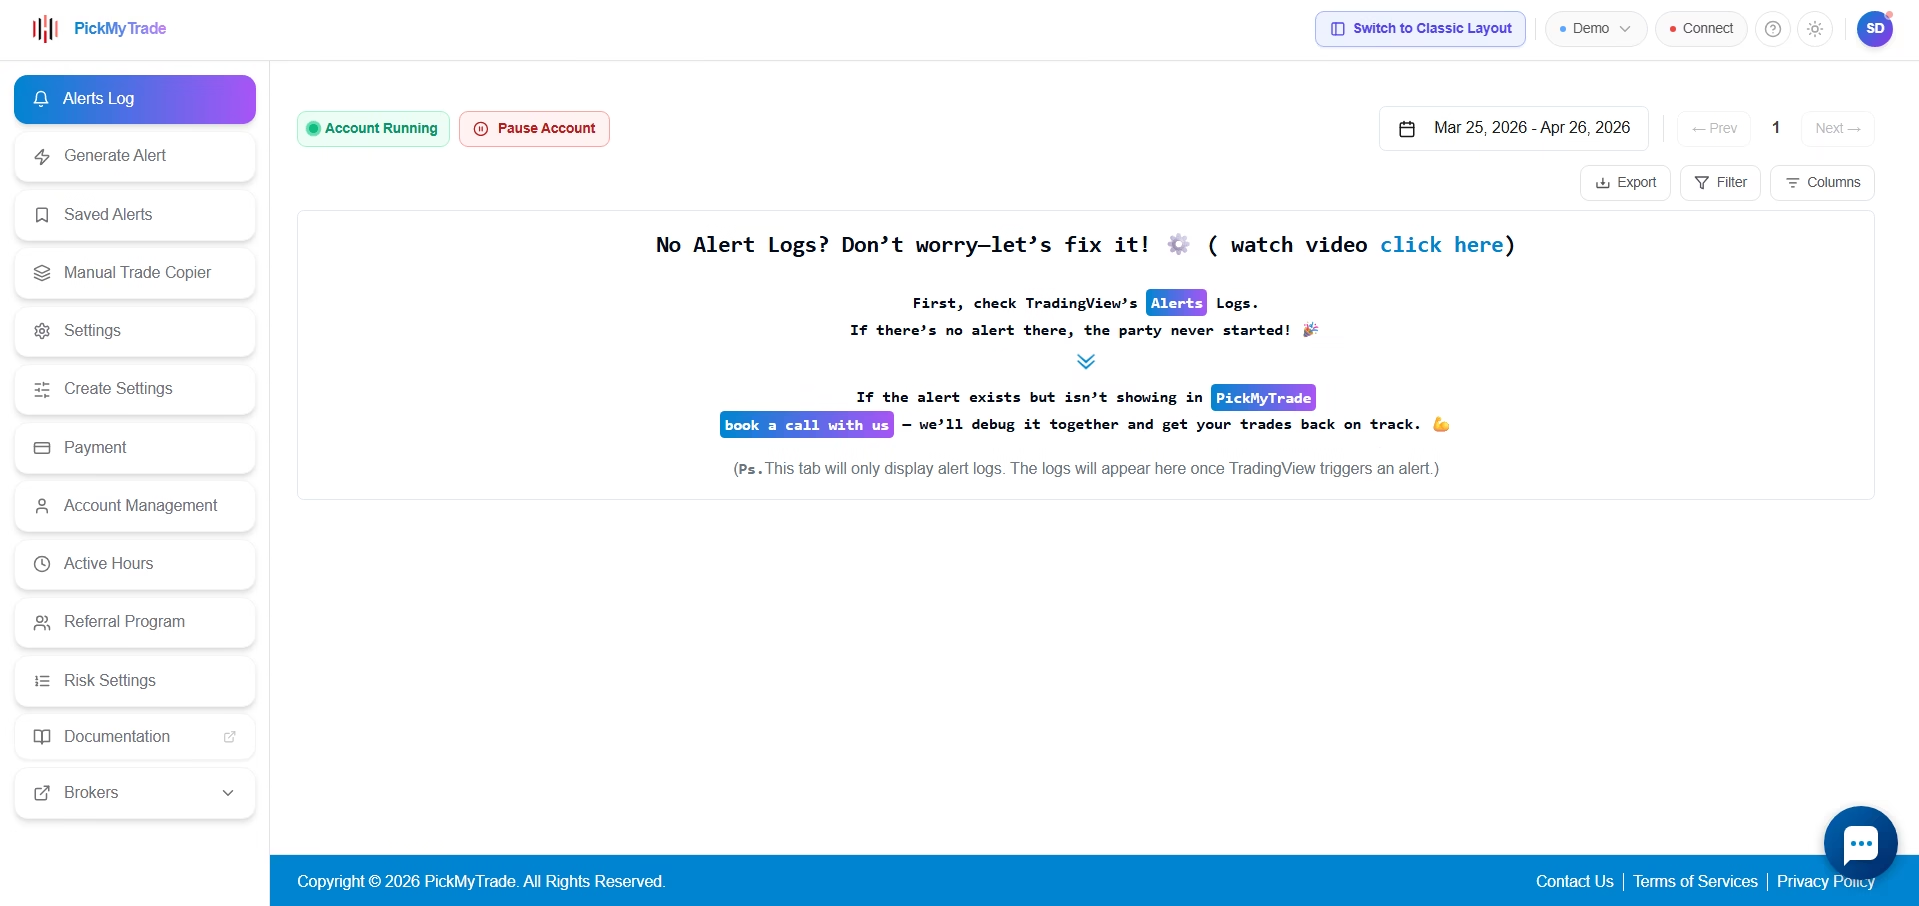
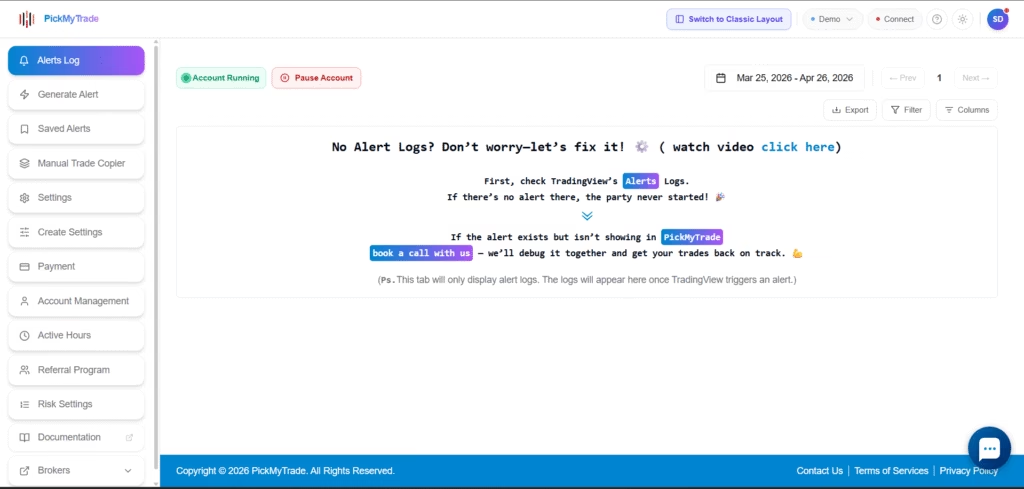
Layout overview and top bar #
The left sidebar provides one-click access to every major section of PickMyTrade, a Documentation shortcut, and a Brokers drop-down with broker-specific links. The top bar keeps your account-level controls in a fixed location: environment switching, Tradovate connection, help, display theme, and your profile menu.
On first login or after a fresh session, a welcome screen prompts for your email address before loading the dashboard.
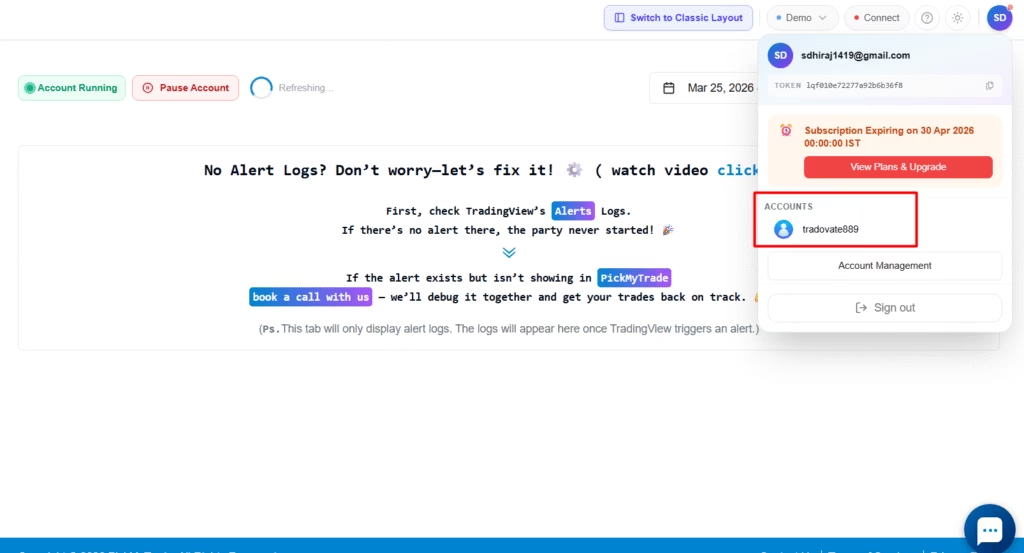
Profile overview #
The profile menu in the top bar gives you instant access to your account details from any page. Click your profile icon to view your registered email address, your PickMyTrade token for webhook authentication, your active subscription tier, and all Tradovate accounts linked to your login. You can also open Account Management or sign out directly from this menu.
The profile overview also displays the accounts connected under your PickMyTrade login. Each entry shows the account name and its current connection status, so you can confirm which accounts are active before placing or copying trades.
When a sub-account is created and linked to your main account, it appears immediately in the profile overview. The entry confirms the sub-account name and its connection state, so you can verify the link is active before routing trades to it.
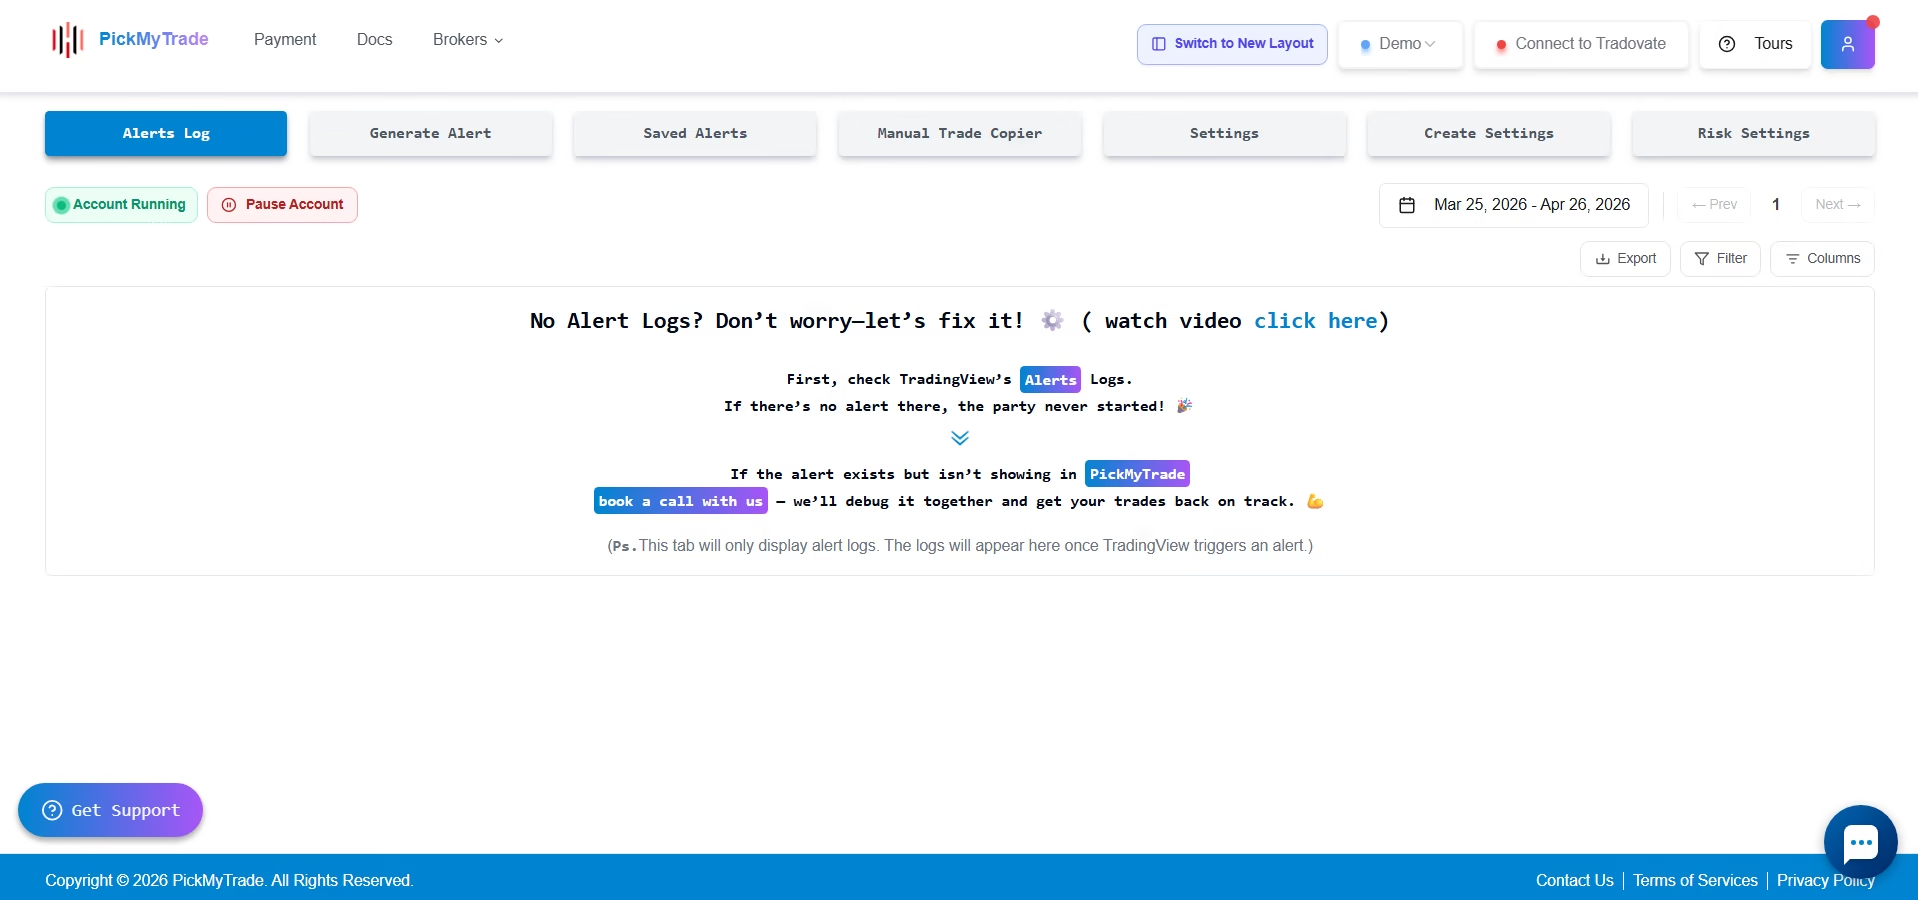
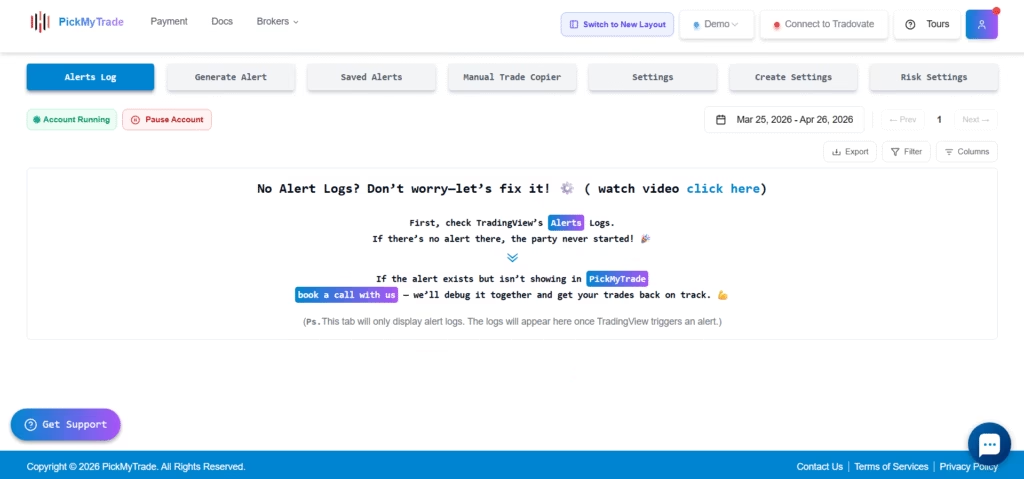
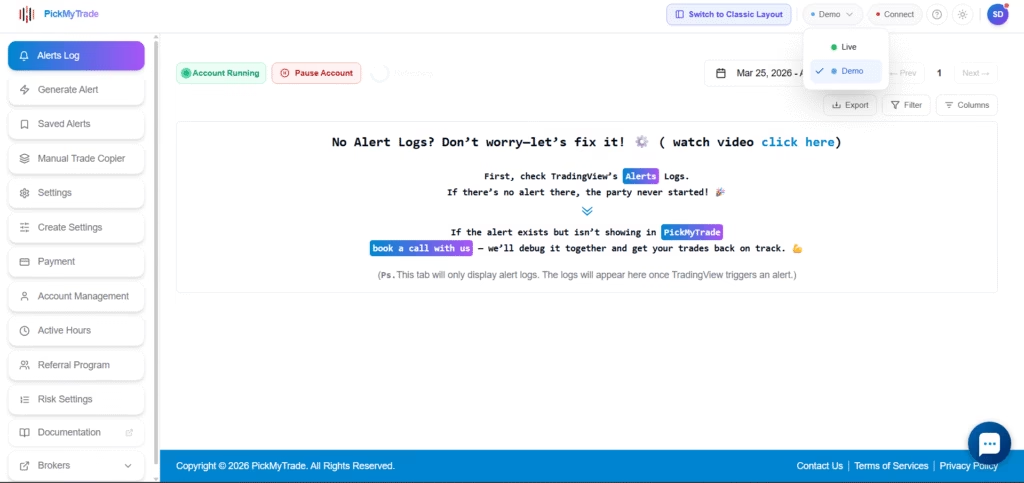
Alerts Log #
The Alerts Log is the primary monitoring page for incoming TradingView activity. It shows your account’s running or paused state, provides date-range filtering, and includes Export, Filter, and Columns controls for detailed review.
When troubleshooting a missing alert, start with the empty-state guidance on this page: if an alert does not appear in the log, confirm that the alert is active in TradingView before investigating further.
Further reading #
Generate Alert #
The Generate Alert workflow is the primary connection point between TradingView and PickMyTrade. On this page you specify the signal source, configure the trading symbol, define exit management, set risk parameters, assign trading accounts, and generate the alert code and webhook URL.
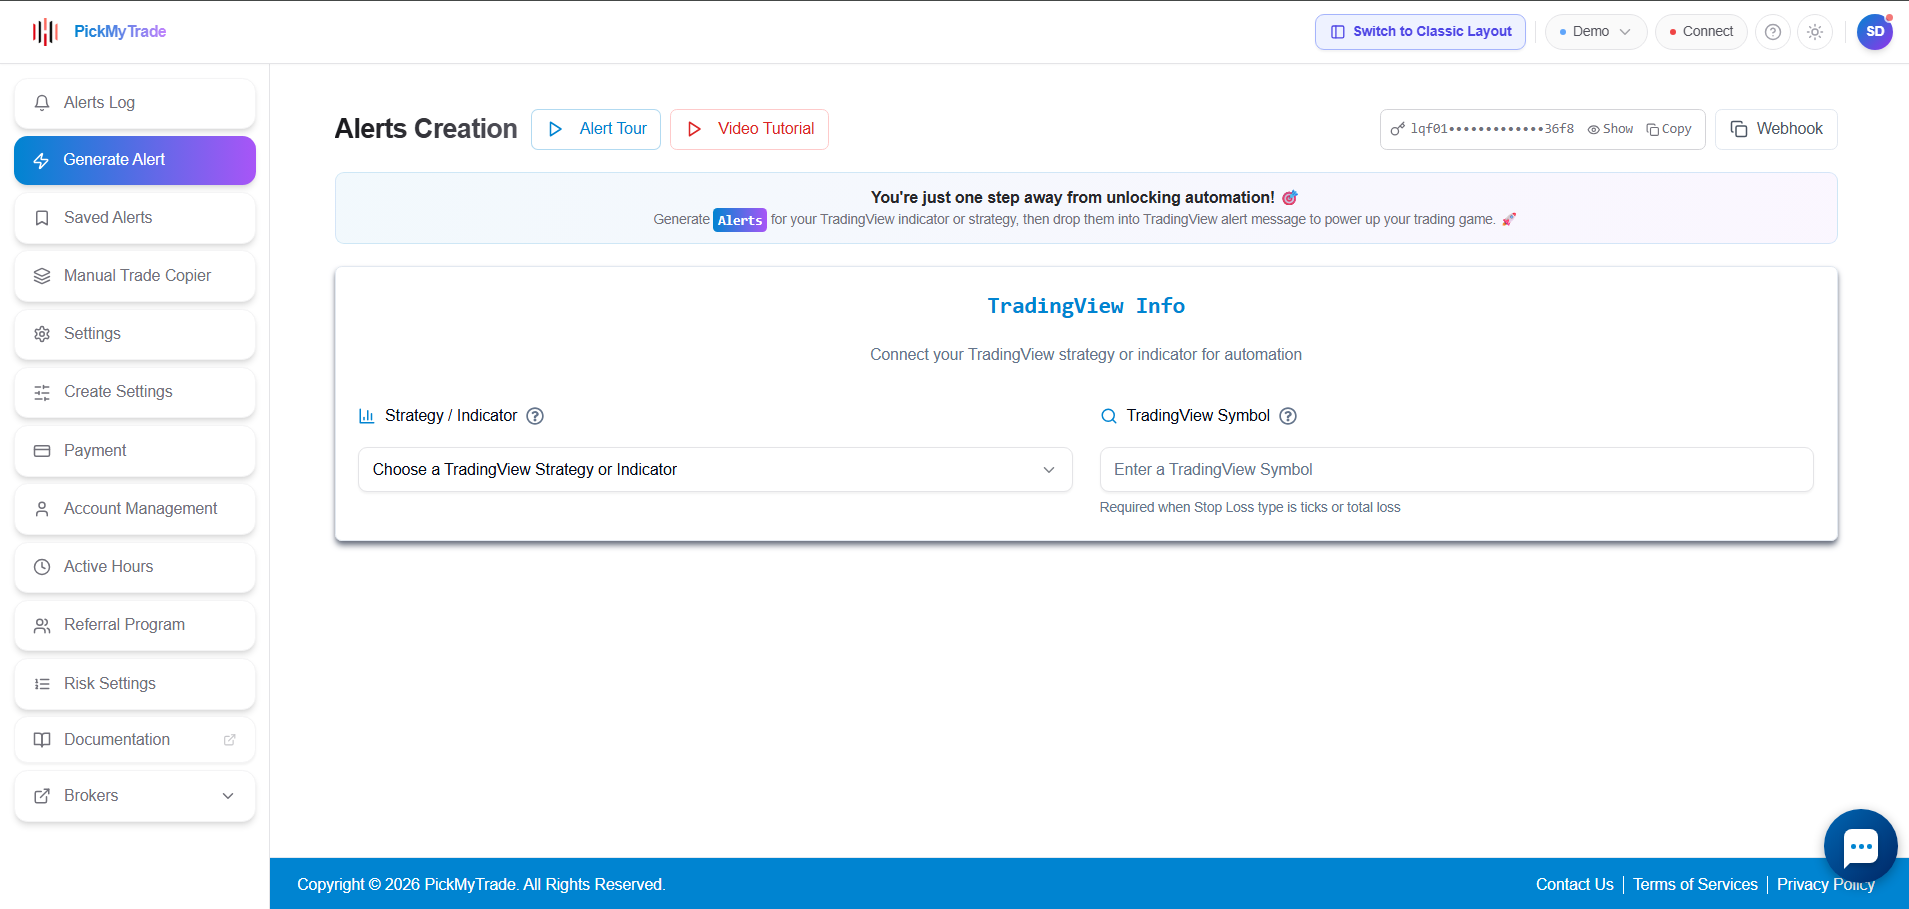
Choose Strategy or Indicator #
Select whether your automation comes from a TradingView strategy or an indicator. This determines the correct alert structure and the JSON format you will use when creating the alert in TradingView.
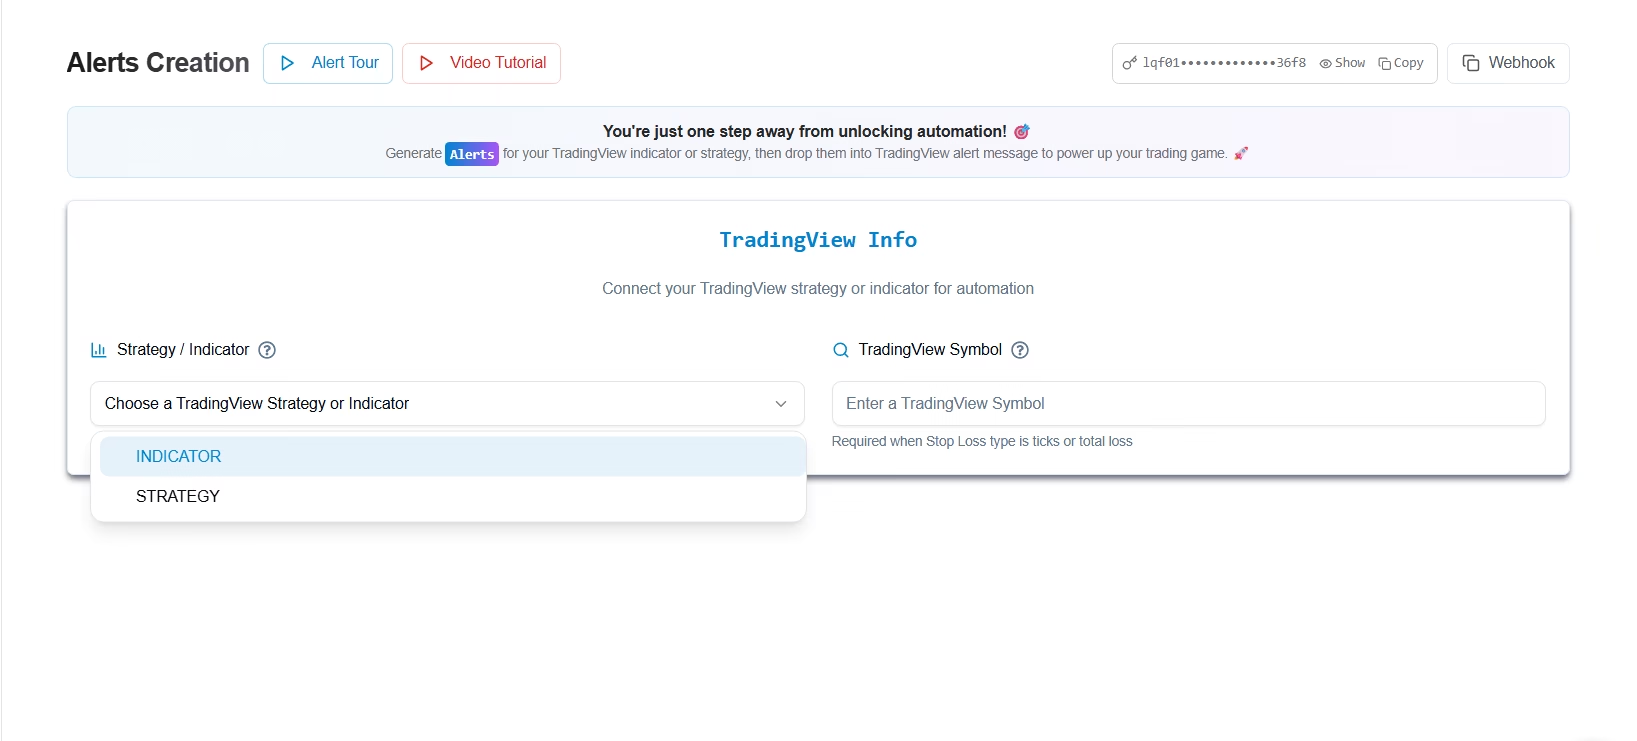
To trade a symbol that differs from your chart symbol — or when stop loss and take profit are calculated using points, ticks, or fixed dollar values — enter the TradingView symbol manually in the symbol field.
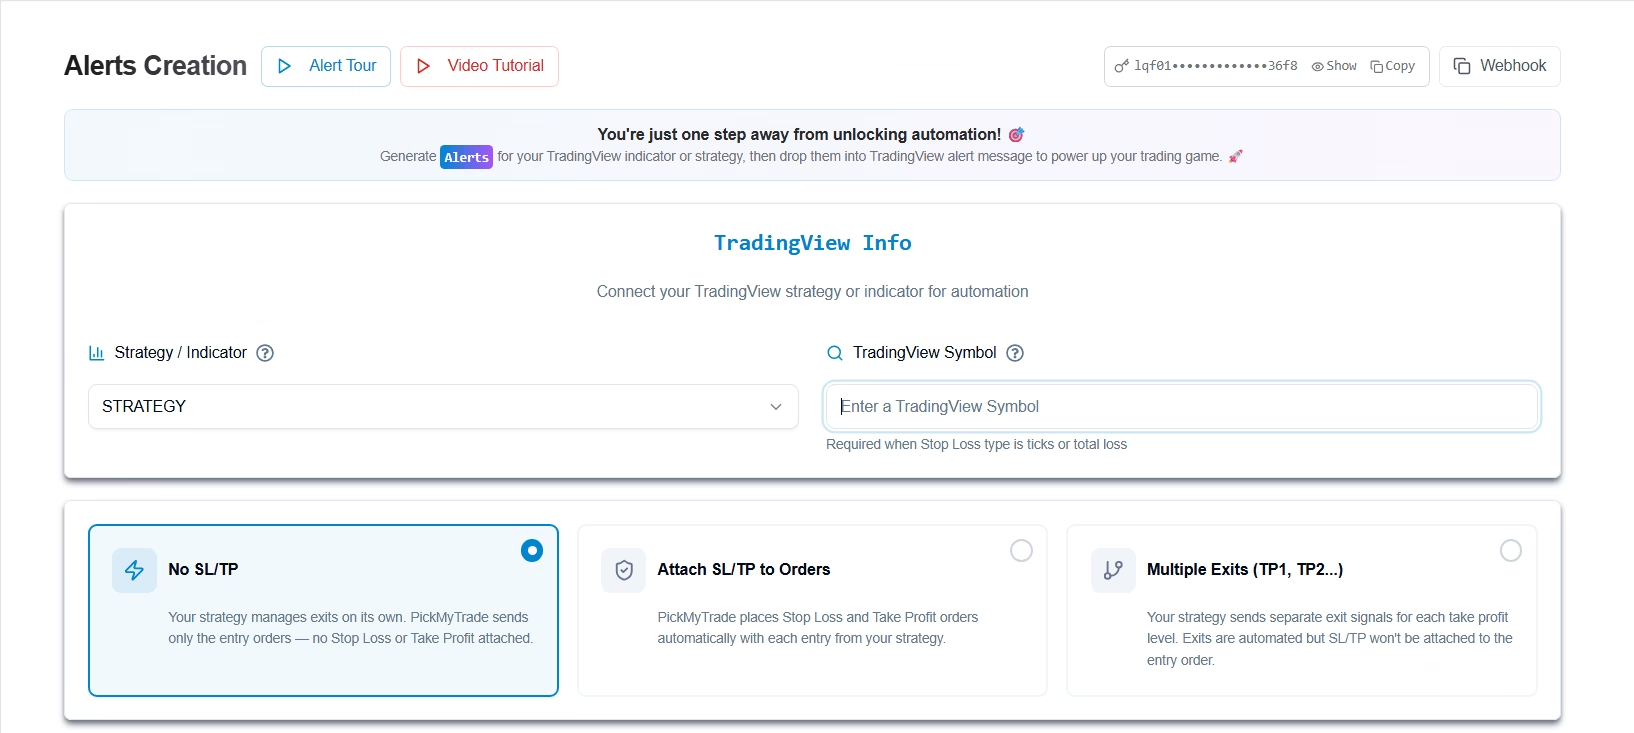
Choose how exits are managed #
Three exit-management modes are available on the Generate Alert page:
No SL/TP Use this when your strategy fully manages exits via its own signals (no broker-side stop loss or take profit orders are attached).
Attach SL/TP to Orders Use this if you want PickMyTrade to handle stop loss and take profit.→ SL/TP levels are attached directly to the order at execution.
Multiple Exits (TP1, TP2…)Use this when your strategy already defines TP/SL inside Pine Script and sends separate exit signals (for partial exits or scaling out).
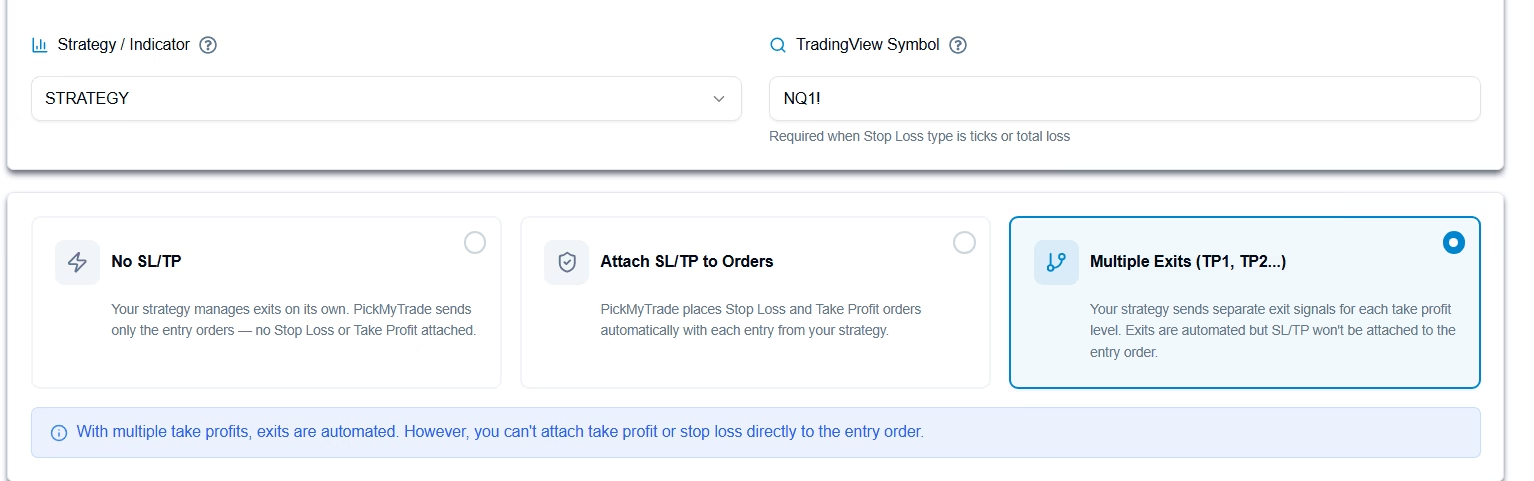
Risk management, break-even, and trailing stop #
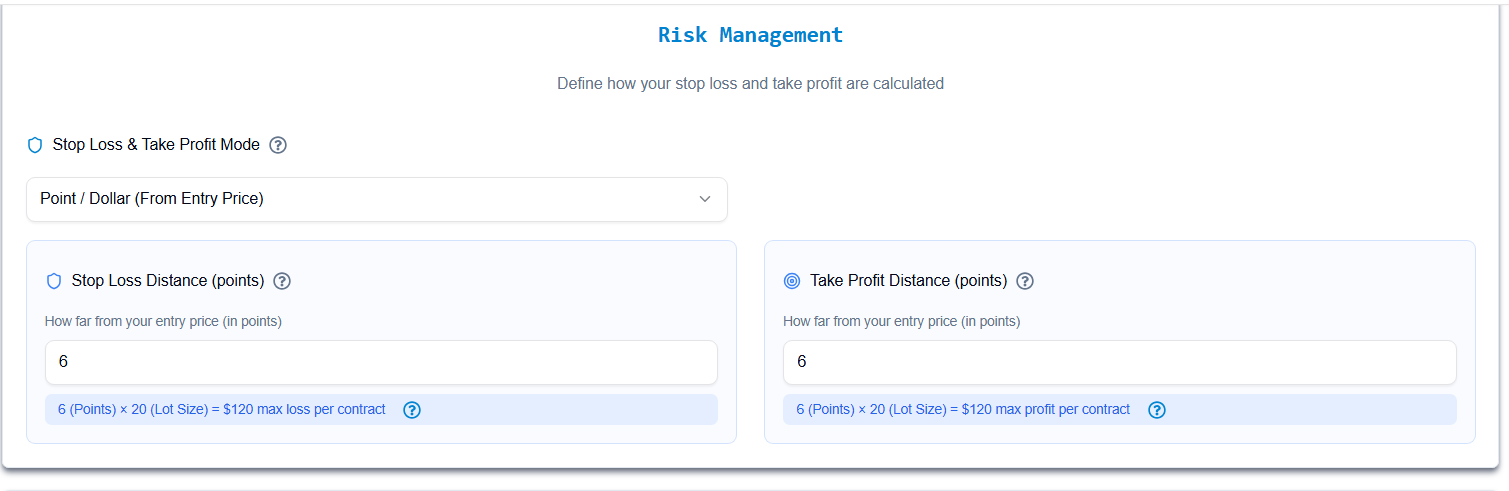
The Risk Management block controls how stop loss and take profit levels are calculated. Available calculation modes include points, ticks, dollar values, risk %, TradingView price, and total P/L logic.
All related inputs and explanations are shown within this block.
Note:
The actual calculated values are shown below — please make sure to check these when generating the alert.
These values represent the real SL/TP outcome (total loss, profit, breakeven, etc.), not just the numbers you enter.
They will vary depending on the symbol (e.g., NQ, ES, etc.), so always rely on the calculated output, not the raw input
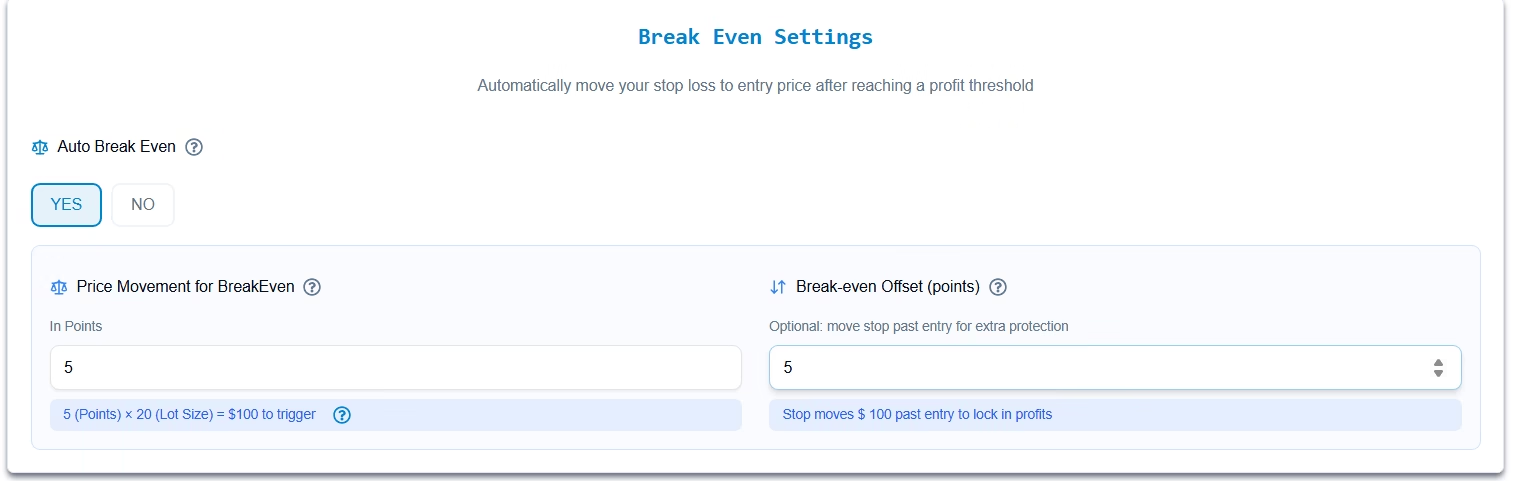
The Break-Even block lets PickMyTrade automatically move the stop loss to the entry price once a defined profit threshold is reached. An optional offset value locks in a small amount of profit rather than stopping exactly at break-even.
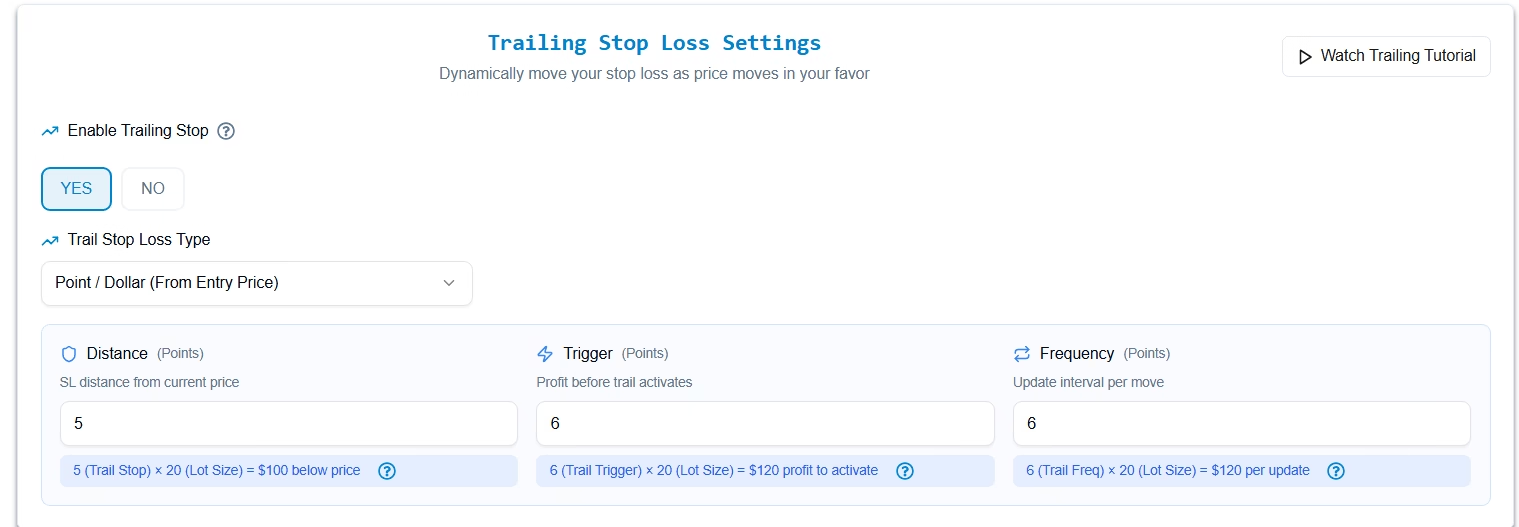
The Trailing Stop Loss block configures the trailing distance, the profit level that activates trailing, and the update frequency — how often the stop adjusts as the trade moves in your favor.
Add one or more trading accounts #
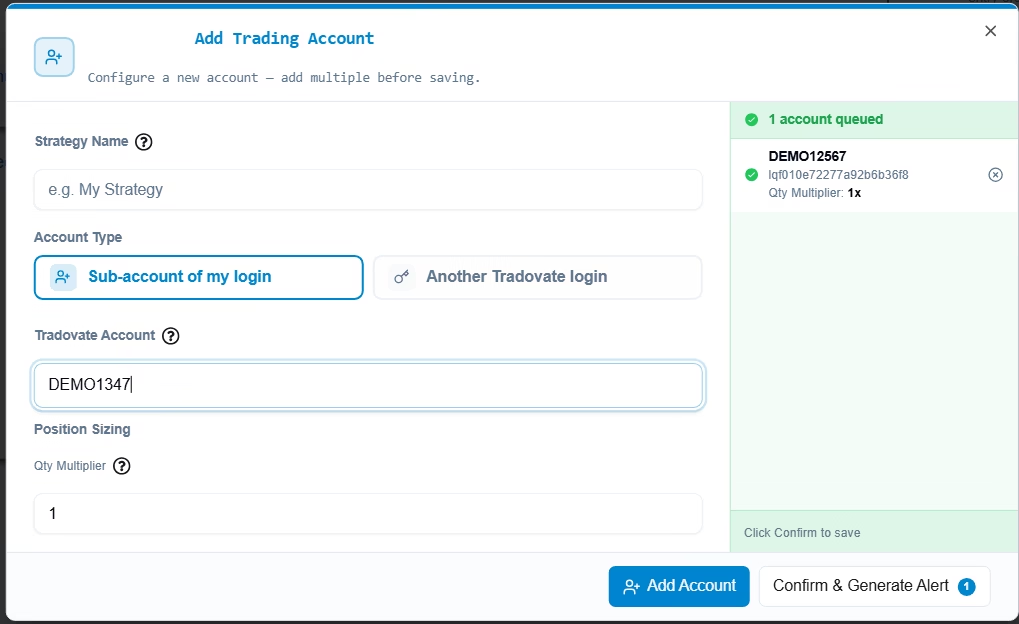
Before generating the alert code, assign one or more trading accounts to the alert. Each account entry requires a strategy name, an account type (current Tradovate login or a separate Tradovate login), and a quantity multiplier for position sizing.
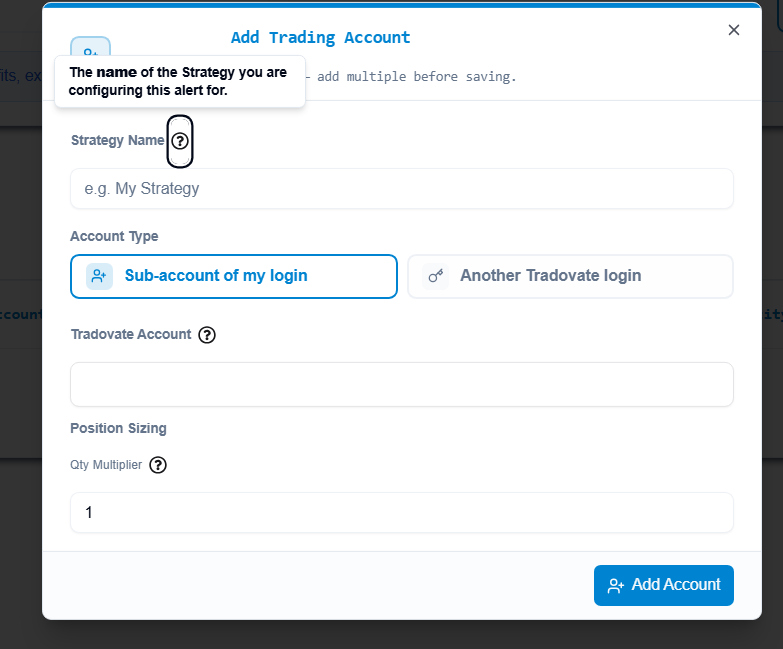
When working with multiple accounts, add each one to the queue before confirming. The queued account list appears on the right side of the modal so you can review all assignments before generating.

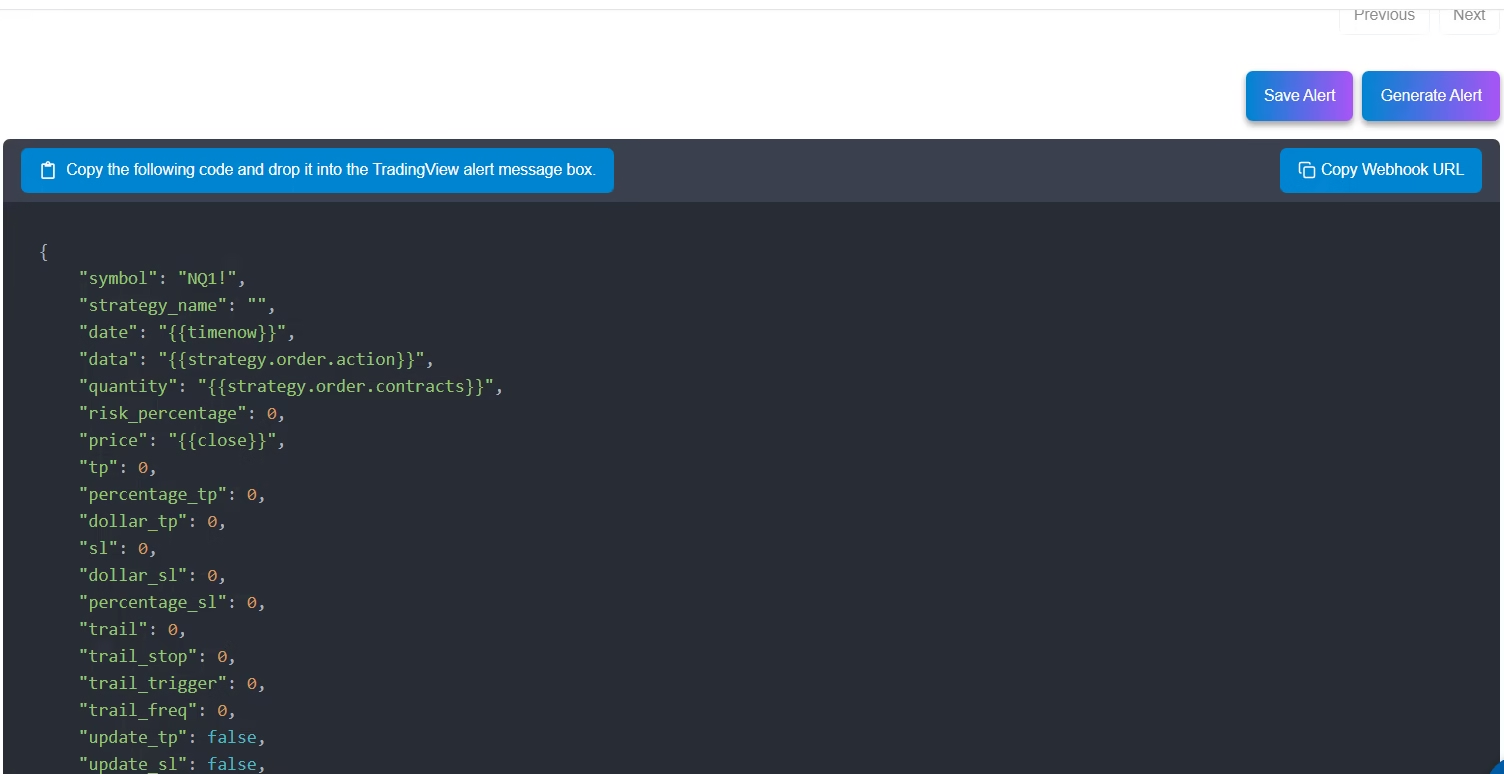
Copy the generated code and webhook #
After generation, a confirmation modal displays the alert code and webhook URL. Copy the alert code into TradingView’s alert message field and paste the webhook URL into TradingView’s webhook field. Save the alert from the modal if you need to reuse this configuration.

The generated code also remains visible on the Generate Alert page so you can retrieve the webhook URL at any time without regenerating.
Further reading #
- Configuring TradingView Alerts
- Generate Alert – JSON Configuration for TradingView
- Setting Up Automated Trading for TradingView Indicators
- Automating TradingView Strategies
- Automating TradingView Strategies with Limit Orders
- Multiple Take Profits and Stop Losses
- Advanced TP/SL and Reverse Action
- Configuring Trailing Stop Loss
- Place Trades in Multiple Accounts
- TradingView Plot Placeholder Integration
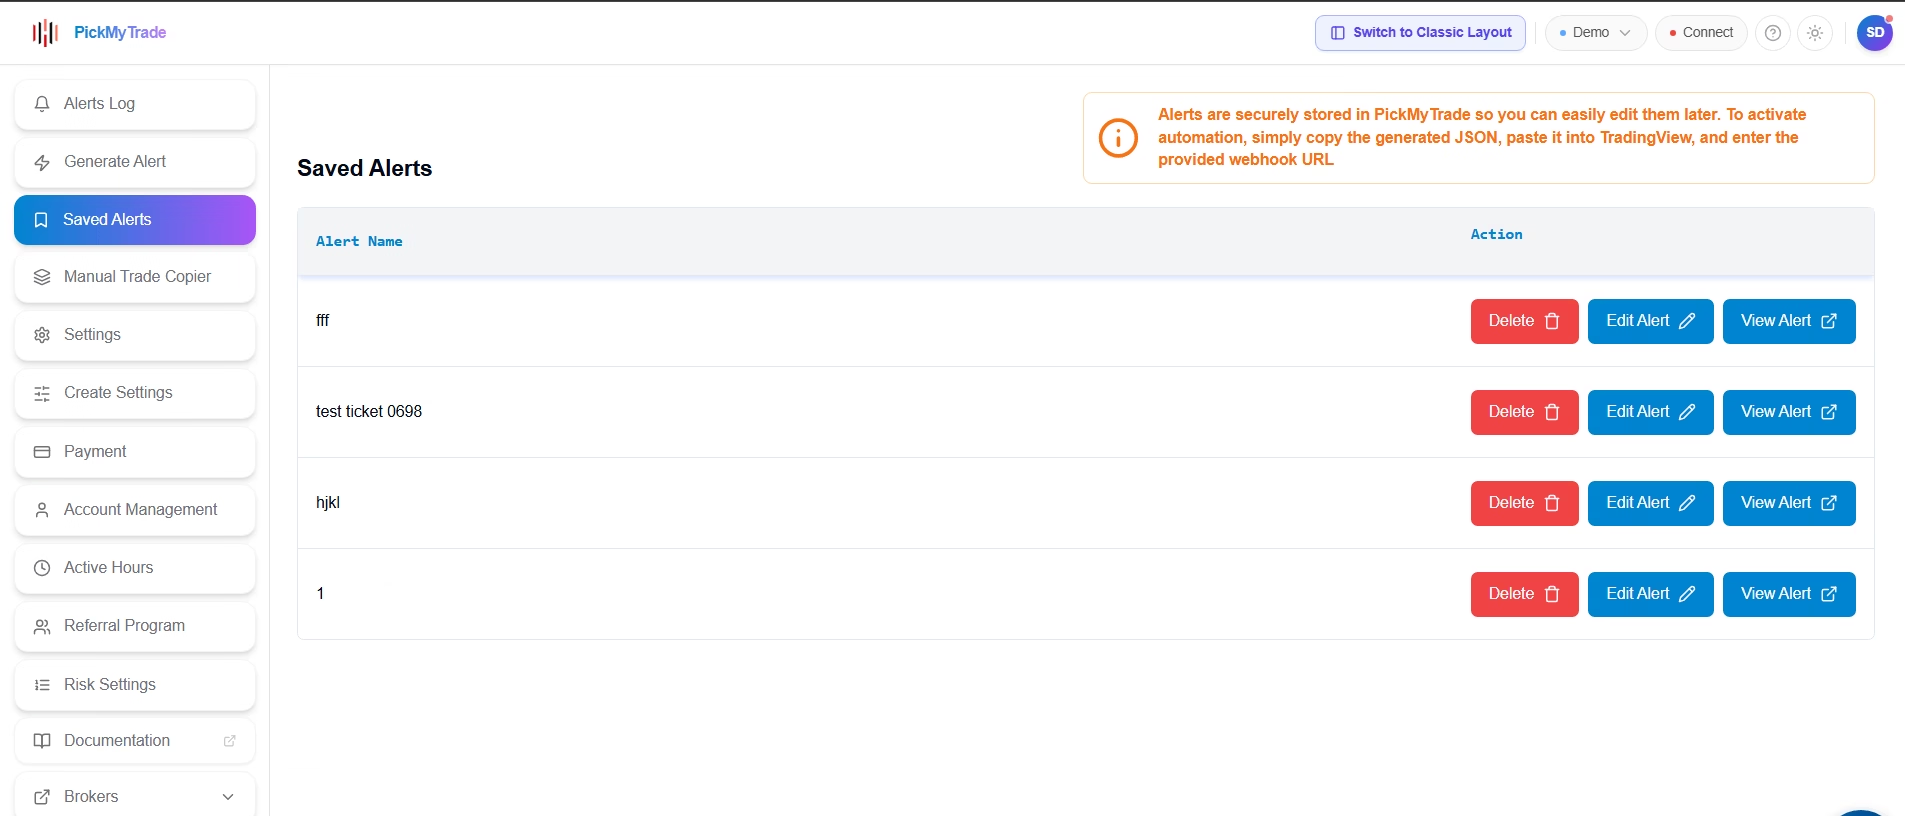
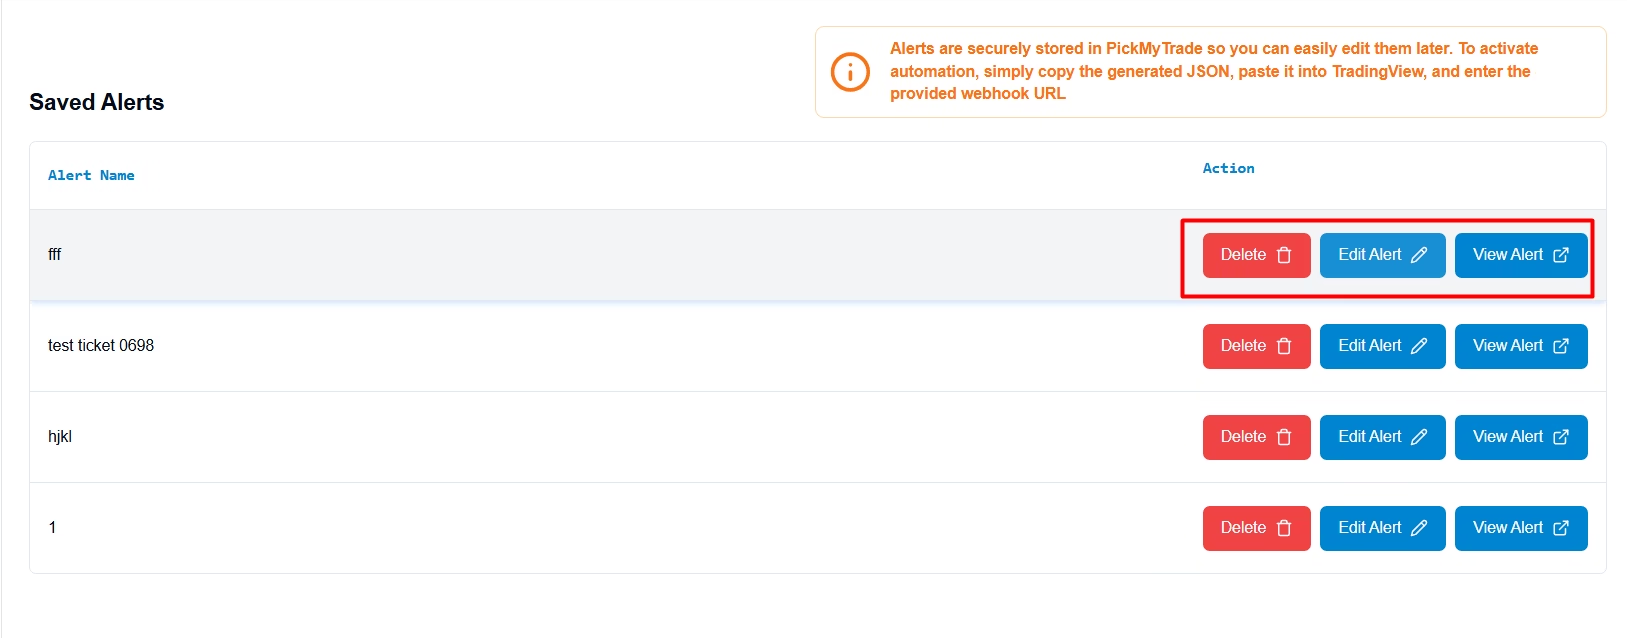
Saved Alerts #
Saved Alerts stores your previously generated alert configurations in a single searchable table. From here you can open, edit, or delete any saved alert — eliminating the need to rebuild configurations from scratch for recurring strategies.
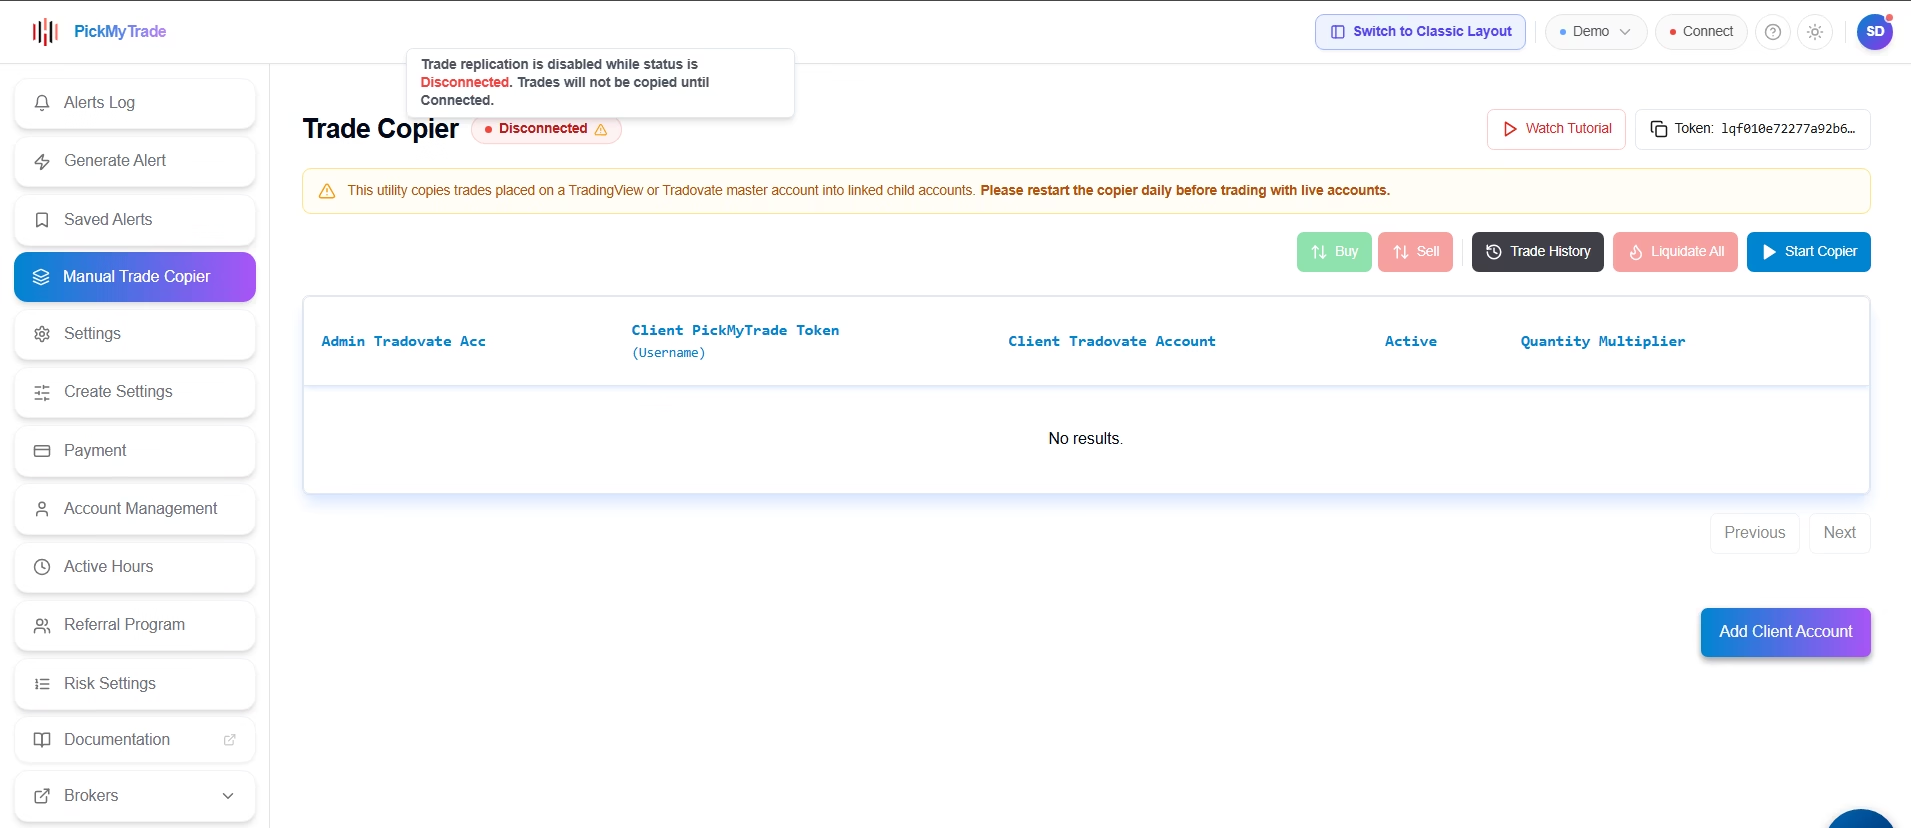
Manual Trade Copier #
The Manual Trade Copier manages trade replication from a master source into one or more linked client accounts. The redesigned page makes the copier status, authentication token, tutorial link, trade controls, and Add Client Account button clearly accessible from a single view.
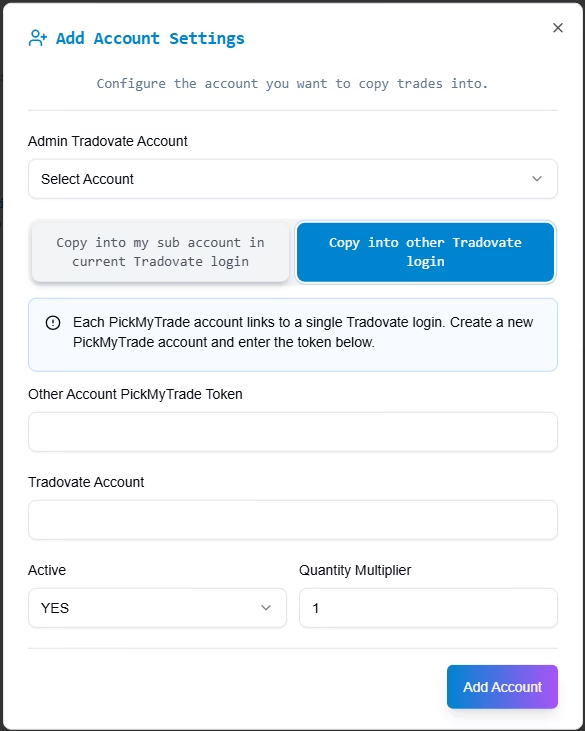
When adding a client account, select between copying into a sub-account within your current Tradovate login or copying into a separate Tradovate login using that account’s PickMyTrade token.

Further reading #
Settings #
The Settings page displays your complete symbol-to-trade mapping in a searchable, filterable table. Each row shows the symbol name, expiry date, order type, quantity, stop loss, take profit, entry offset, Tradovate symbol, lot size, minimum tick, and custom symbol status. Column visibility and filter controls are available at the top of the page.
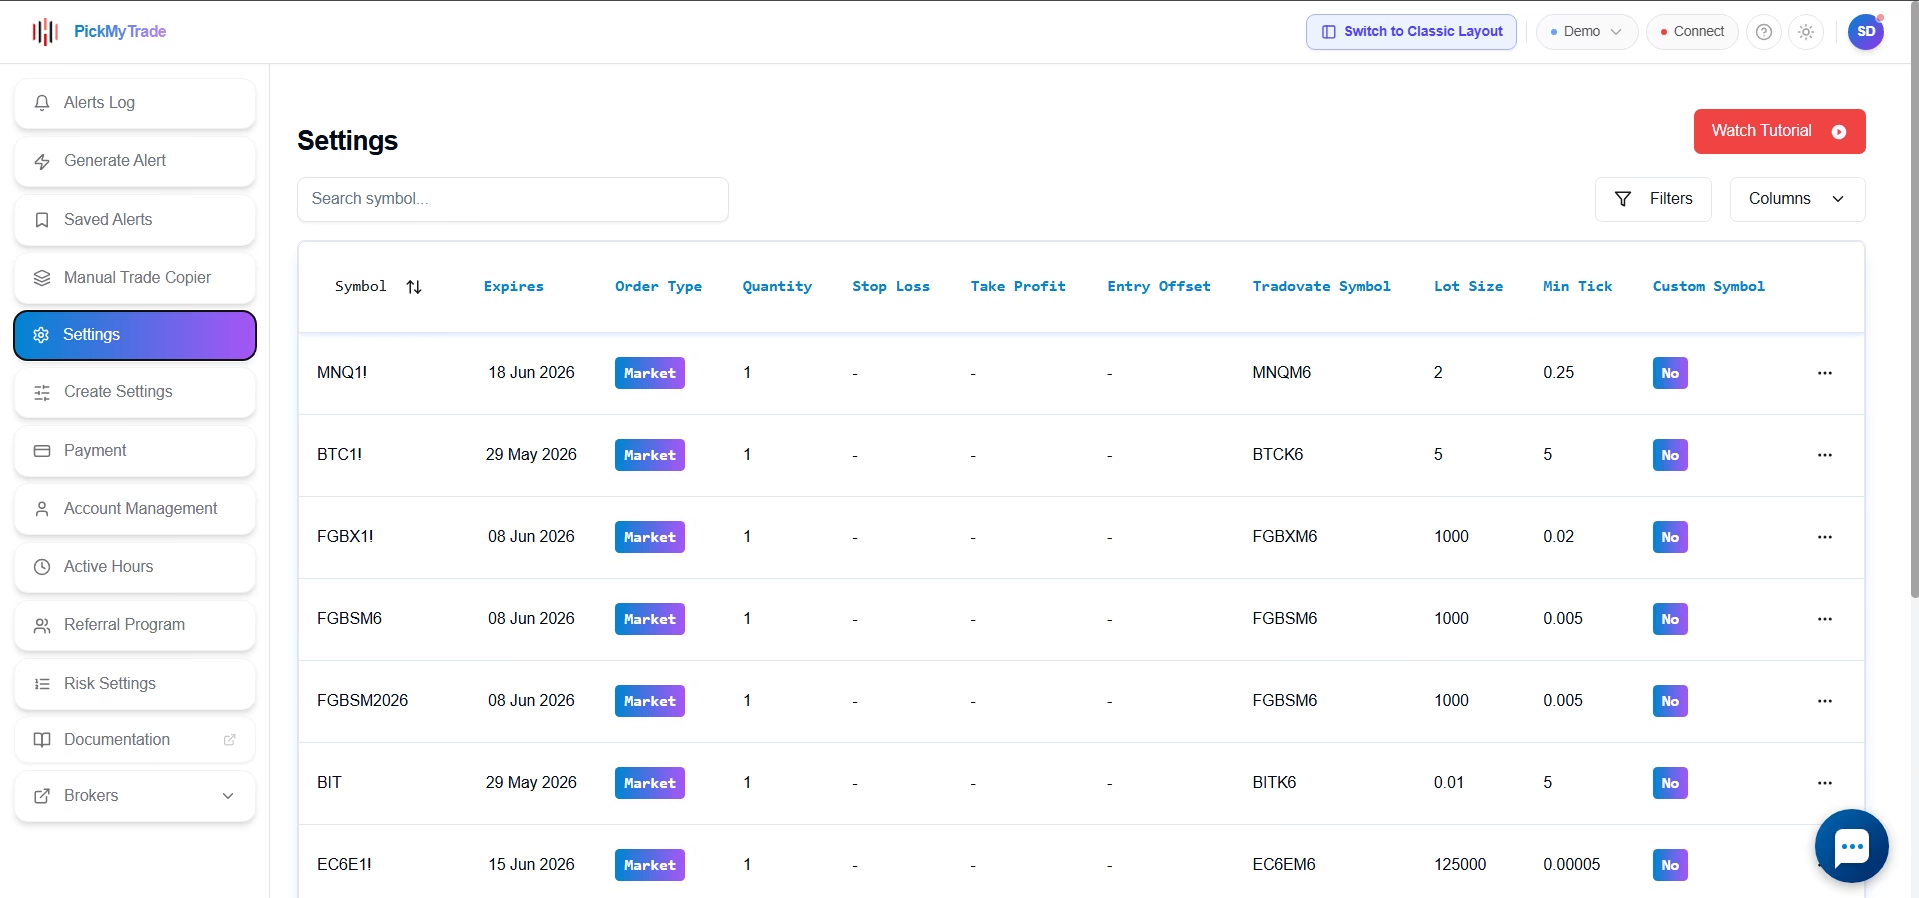
Review this page before setting up new automations to confirm PickMyTrade is mapping your symbols correctly — particularly for futures contracts that roll between contract months.
Further reading #
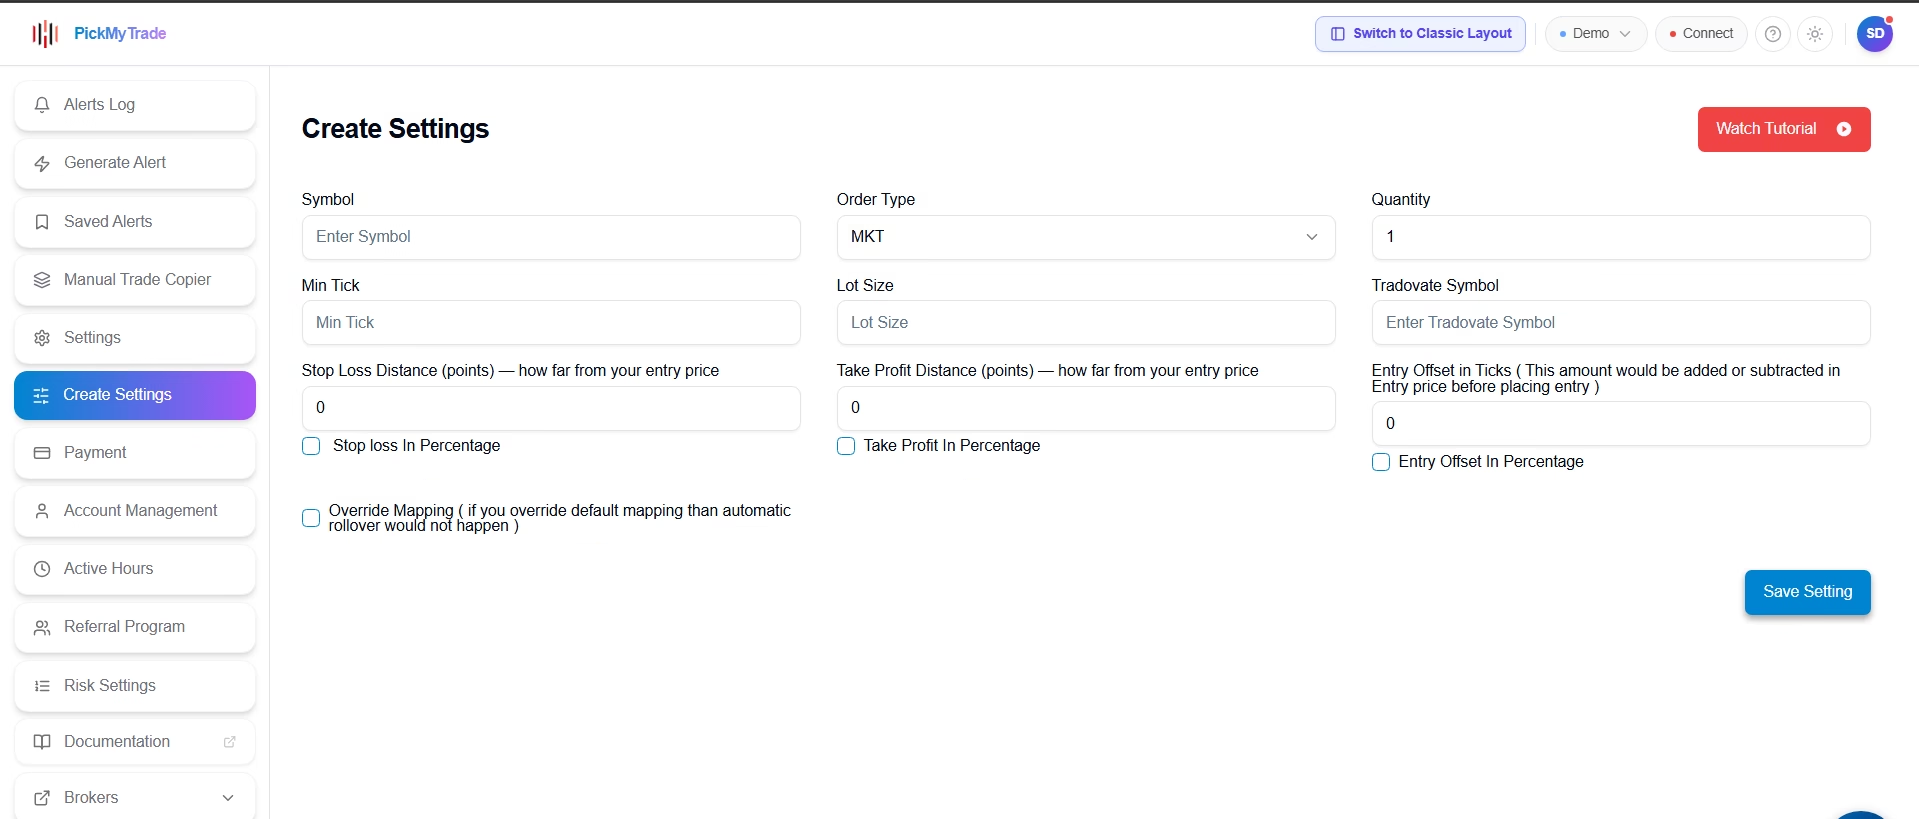
Create Settings #
Create Settings is the manual symbol-mapping tool. Use it to define a new mapping from scratch by specifying the chart symbol, order type, quantity, minimum tick, lot size, Tradovate symbol, stop loss distance, take profit distance, and entry offset. Optional checkboxes enable percentage-based values, and an override mapping toggle is available for custom handling that bypasses automatic rollover behavior.
Further reading #
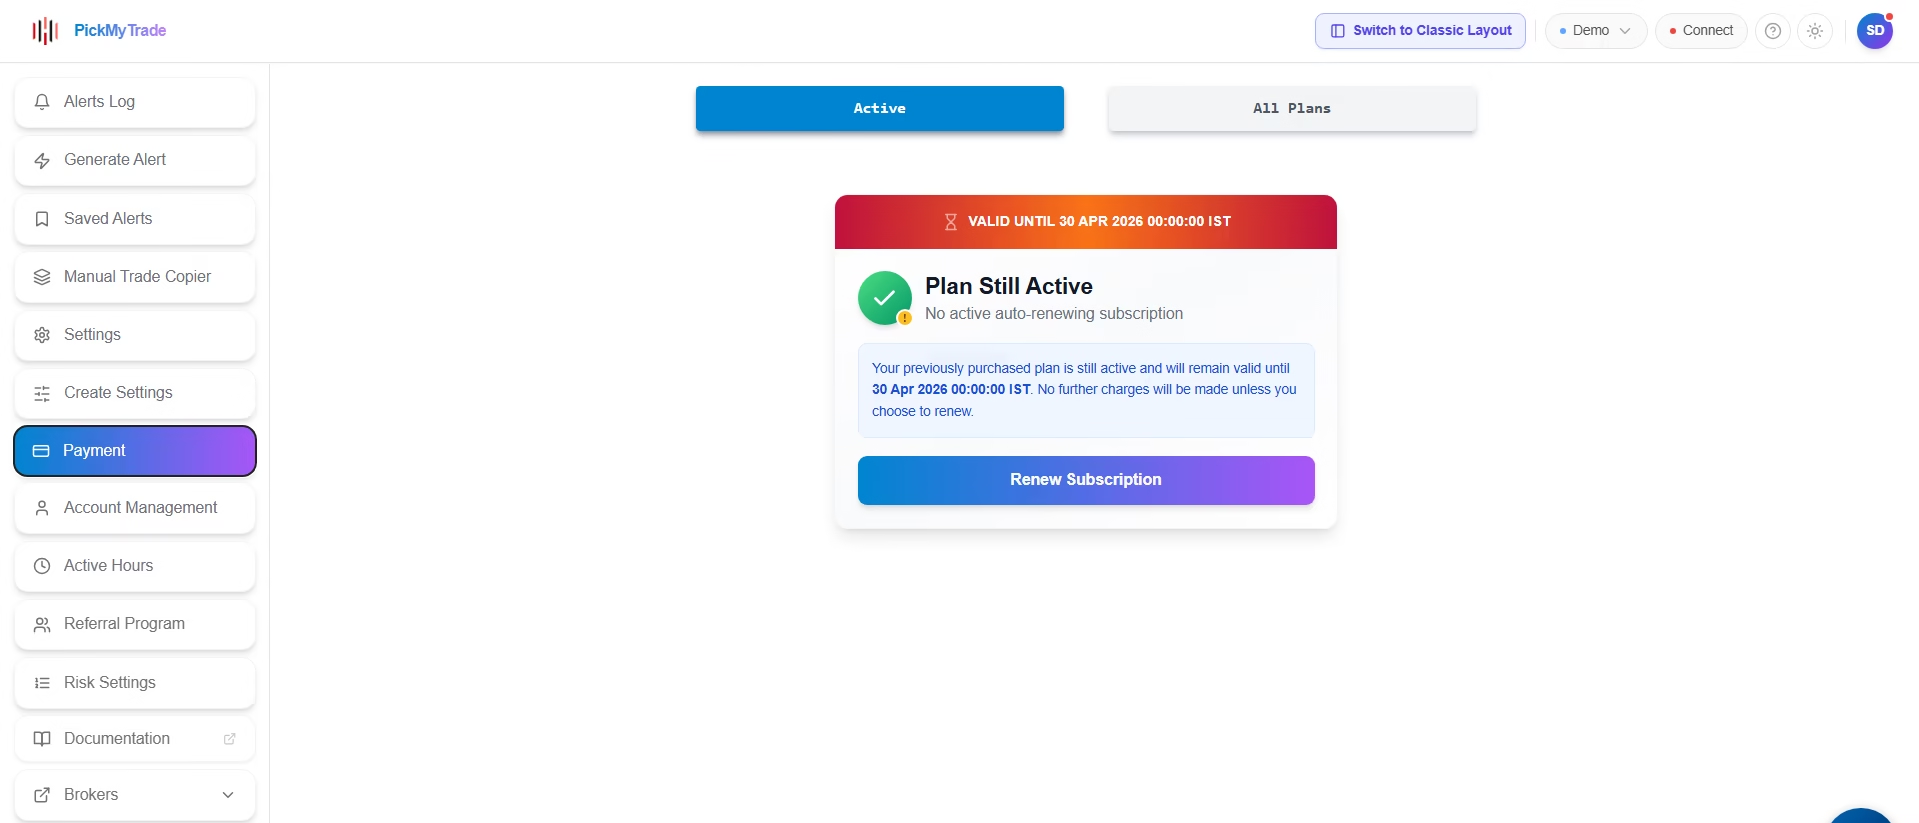
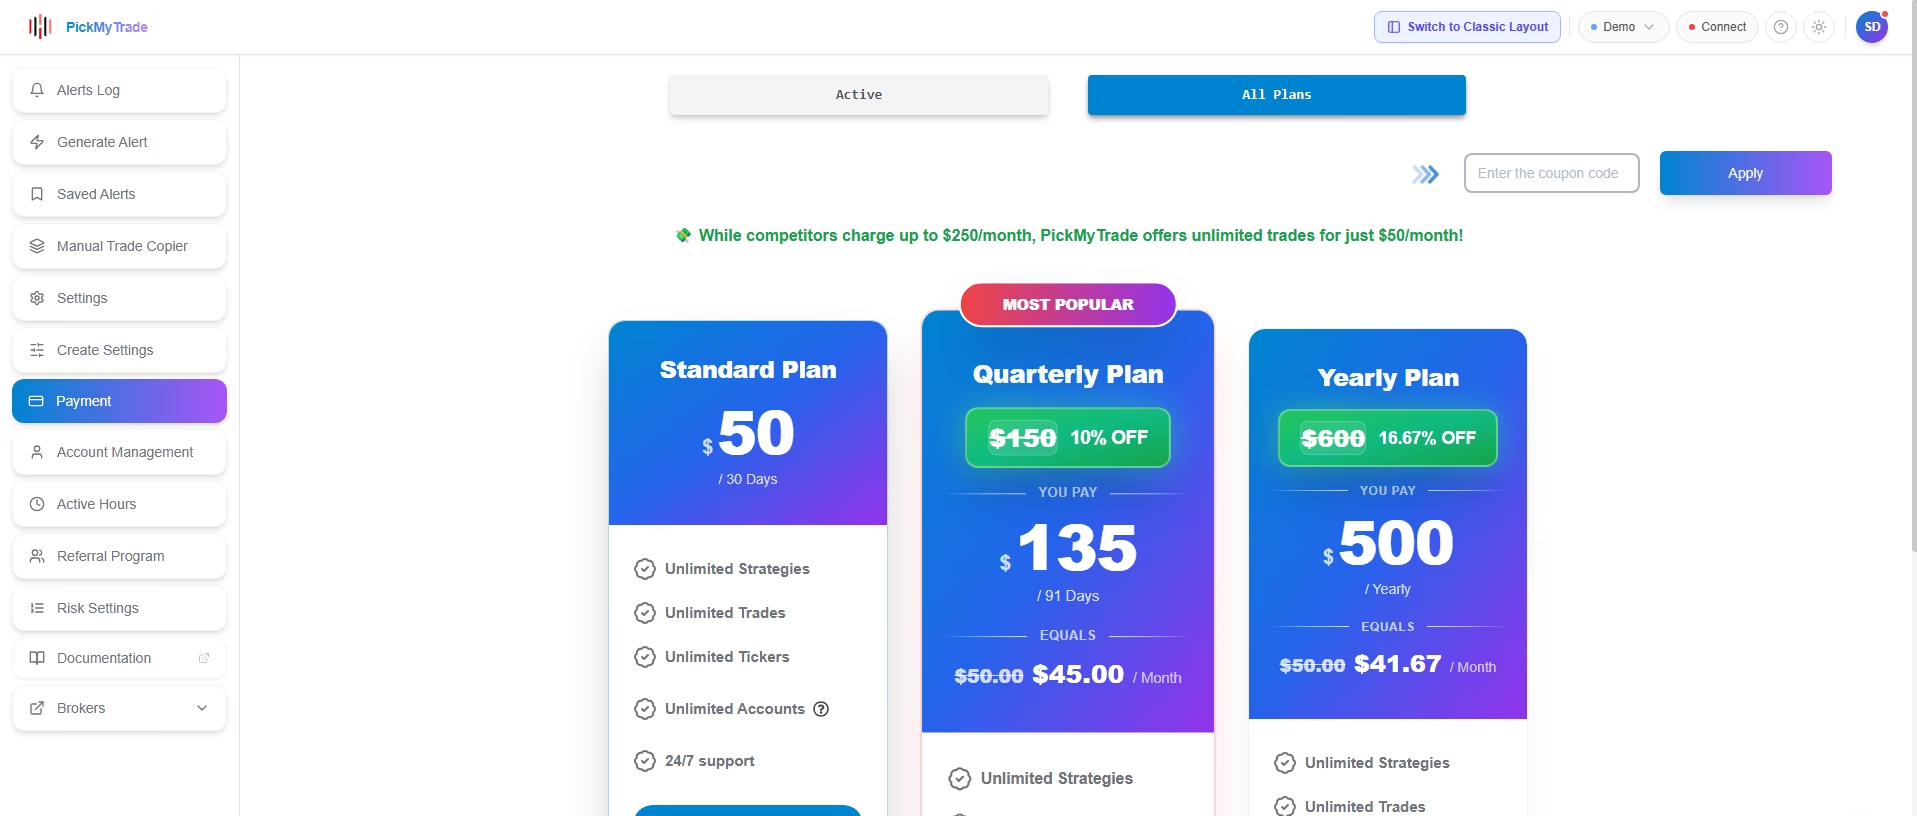
Payment #
The Payment page provides an at-a-glance view of your active subscription and available plan options. Under Active, review your current plan status and renew when needed. Under All Plans, compare the Standard, Quarterly, and Yearly tiers, apply a coupon code, and upgrade your subscription.
Account Management #
The Account Management page organizes your connected trading accounts into four tabs: My Client / Child Accounts, My Master Accounts, Request Access, and Add Account. This is the central hub for managing multiple prop firm accounts, client accounts, or linked accounts under a single PickMyTrade login.
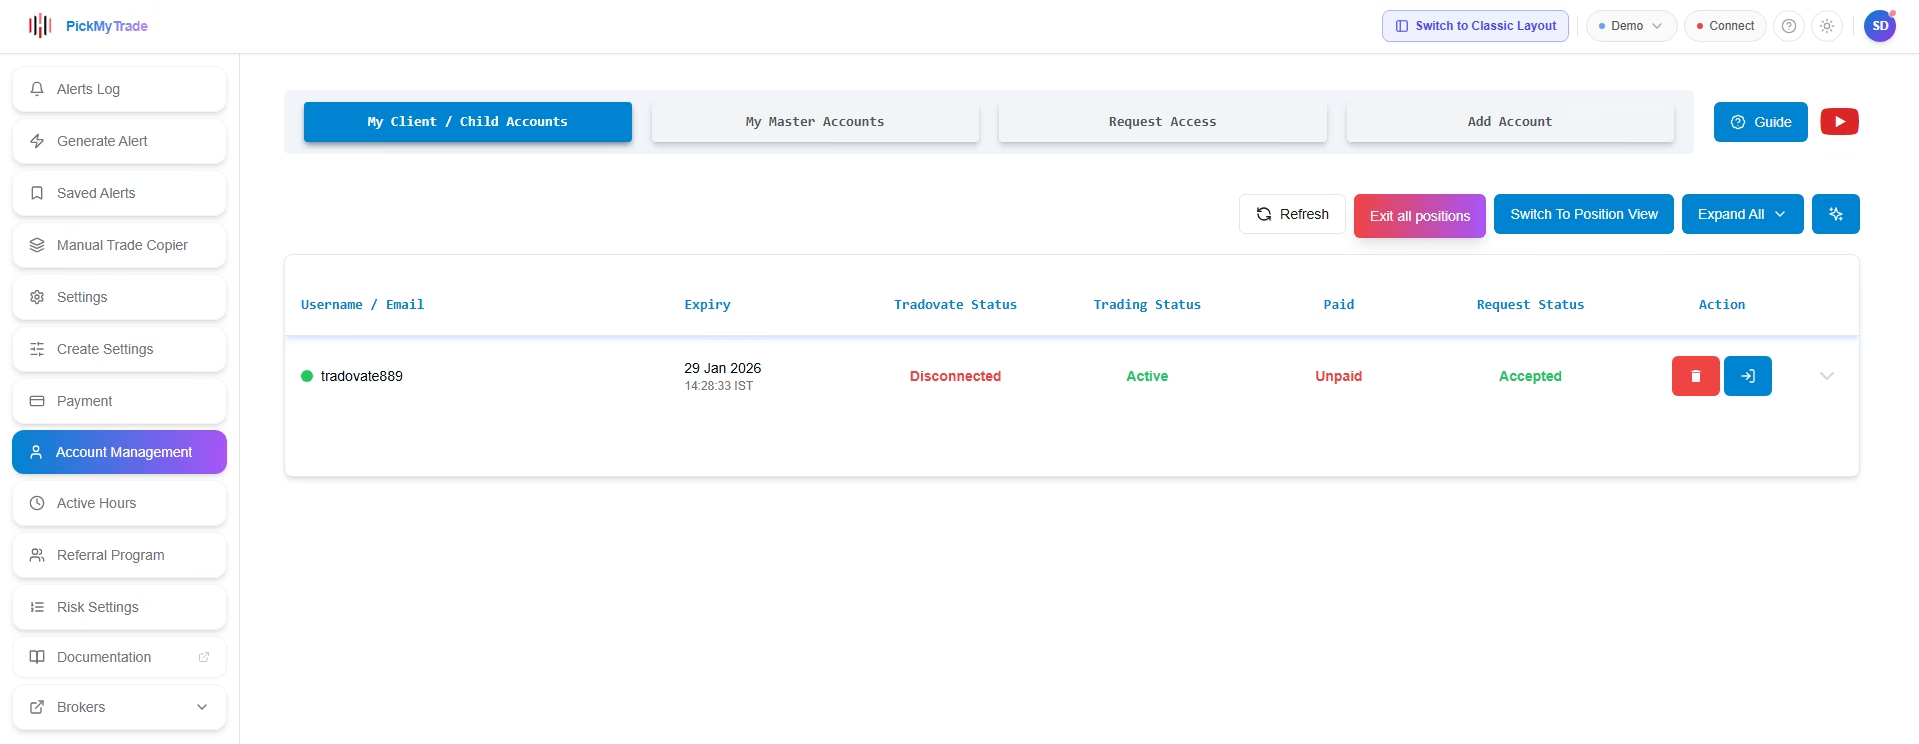
Each account row displays the expiry date, Tradovate connection status, trading status, paid status, and request status. Quick actions — Refresh, Exit All Positions, Switch to Position View, and Expand All — are accessible directly from this page.
Further reading #
Active Hours and News Filters #
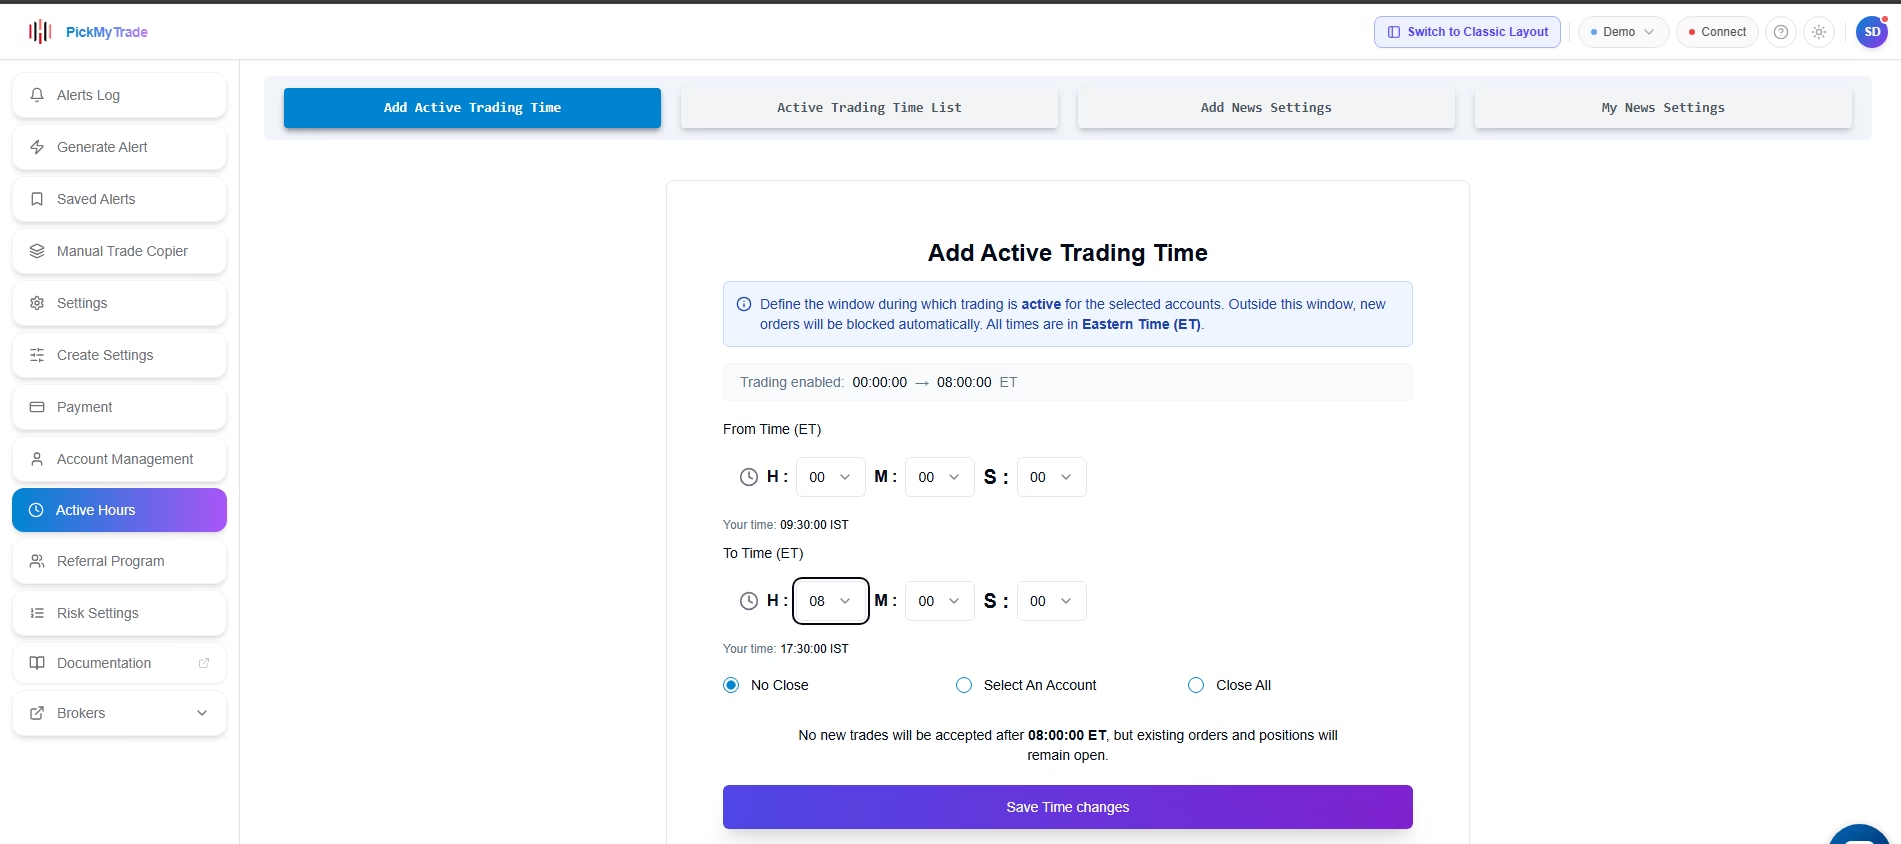
The Active Hours section controls the time windows during which your automations are permitted to execute trades. The redesigned page divides this configuration into four tabs: Add Active Trading Time, Active Trading Time List, Add News Settings, and My News Settings.
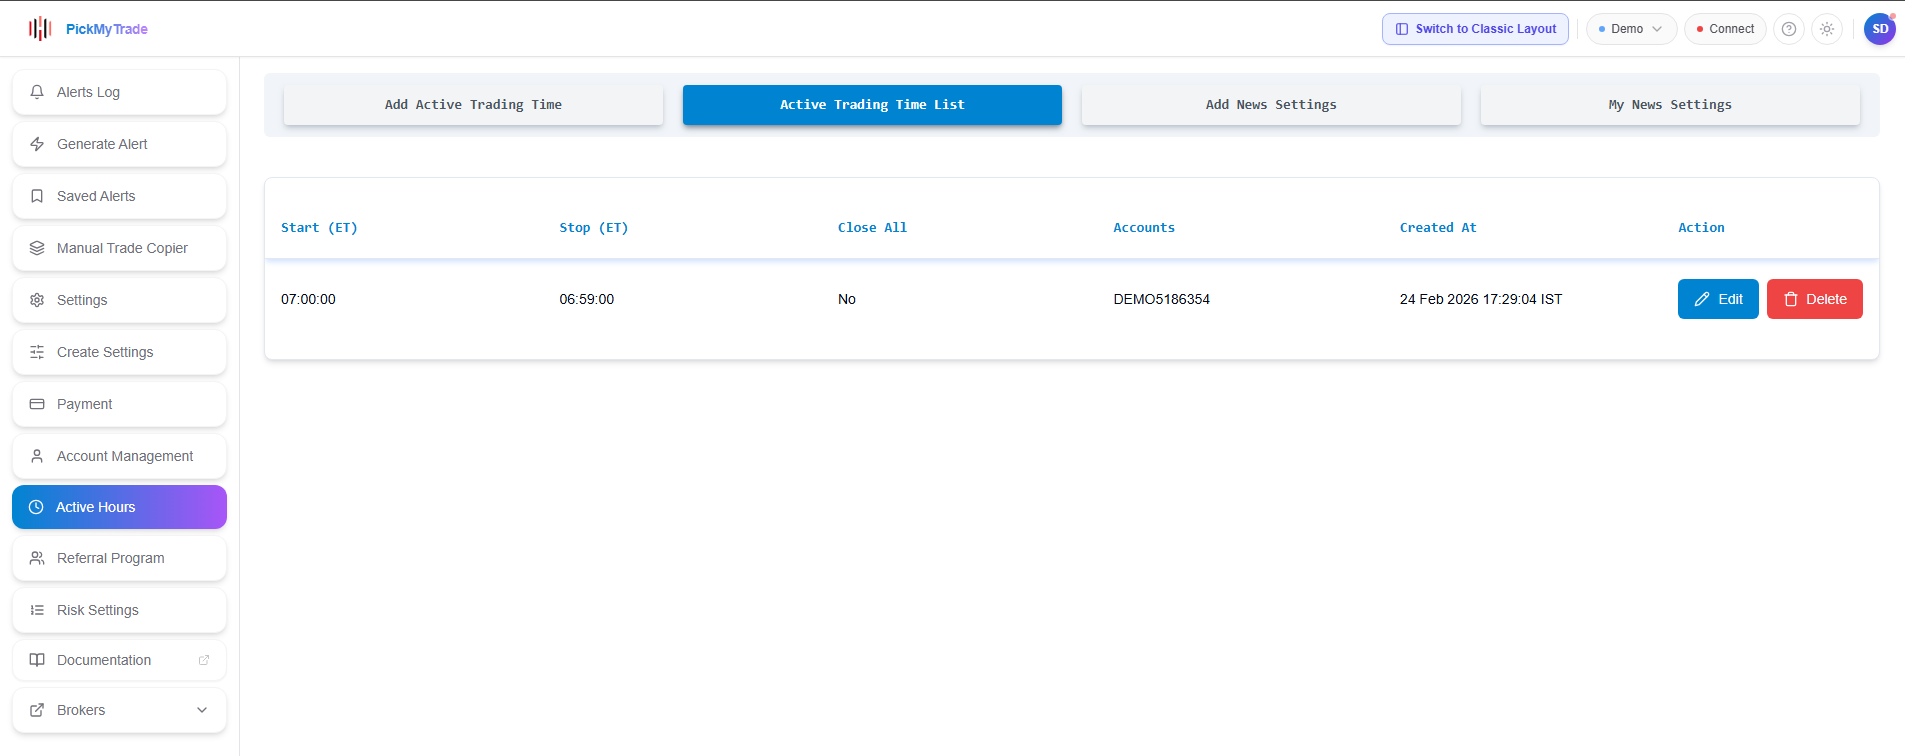
Use Add Active Trading Time to set a start and stop time in Eastern Time. After the window closes, you can configure the platform to leave positions open, close selected accounts, or close all accounts.
Use Add News Settings to pause or delay trading around scheduled economic events. Set how many minutes before the event trading should stop, how many minutes after it should resume, and how open positions should be handled during the pause.
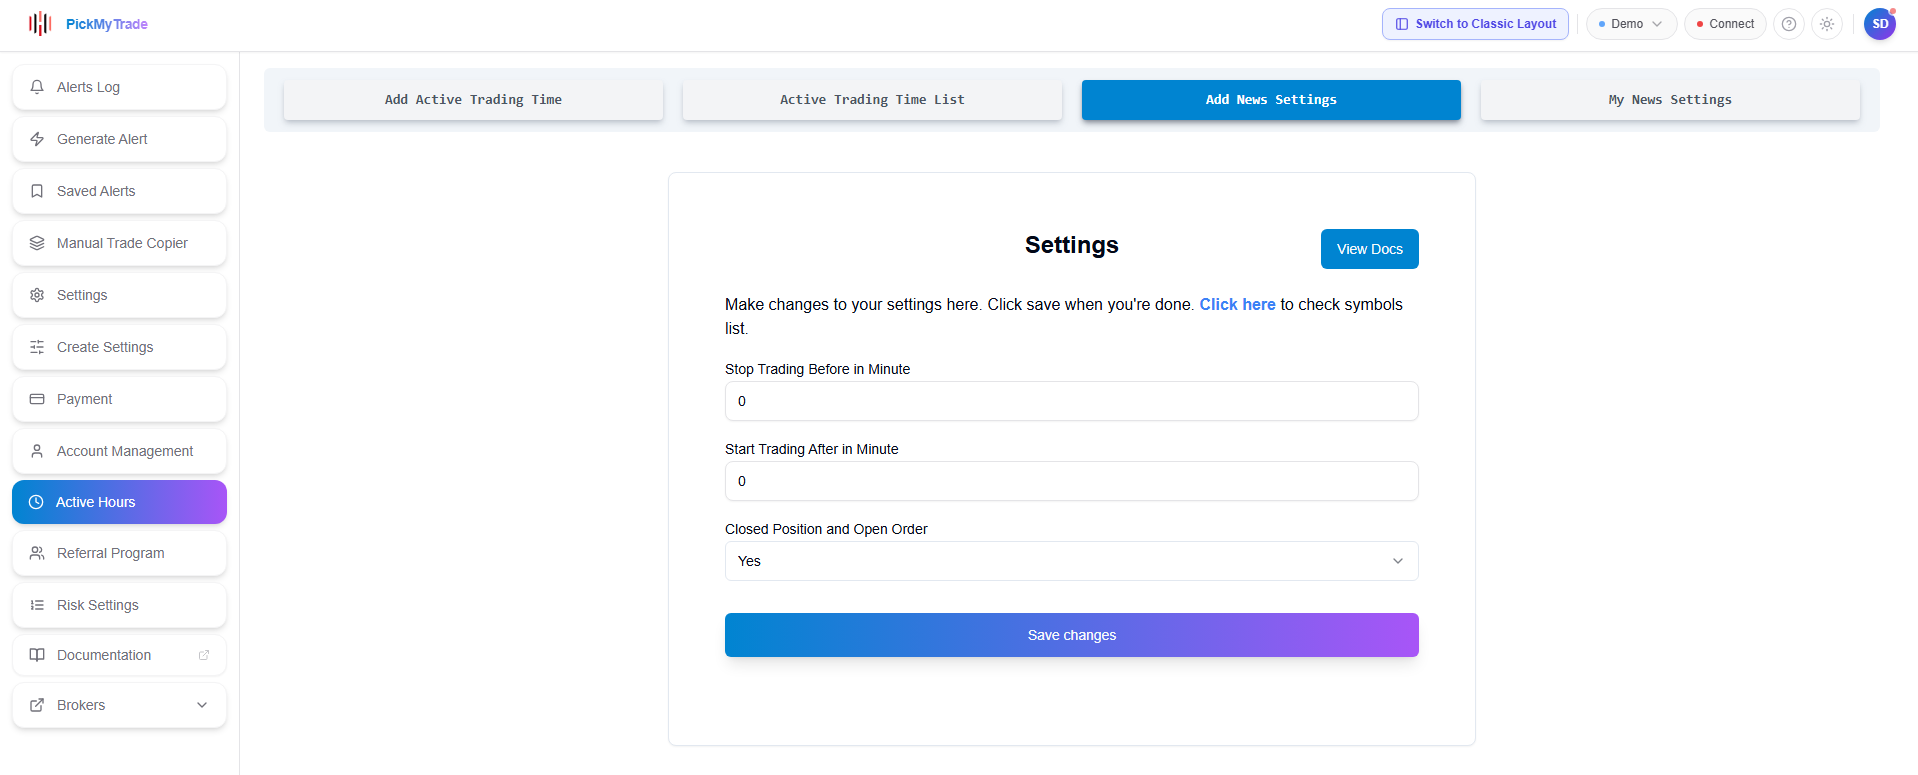
A symbols helper modal is available to confirm supported news symbols before saving the configuration.

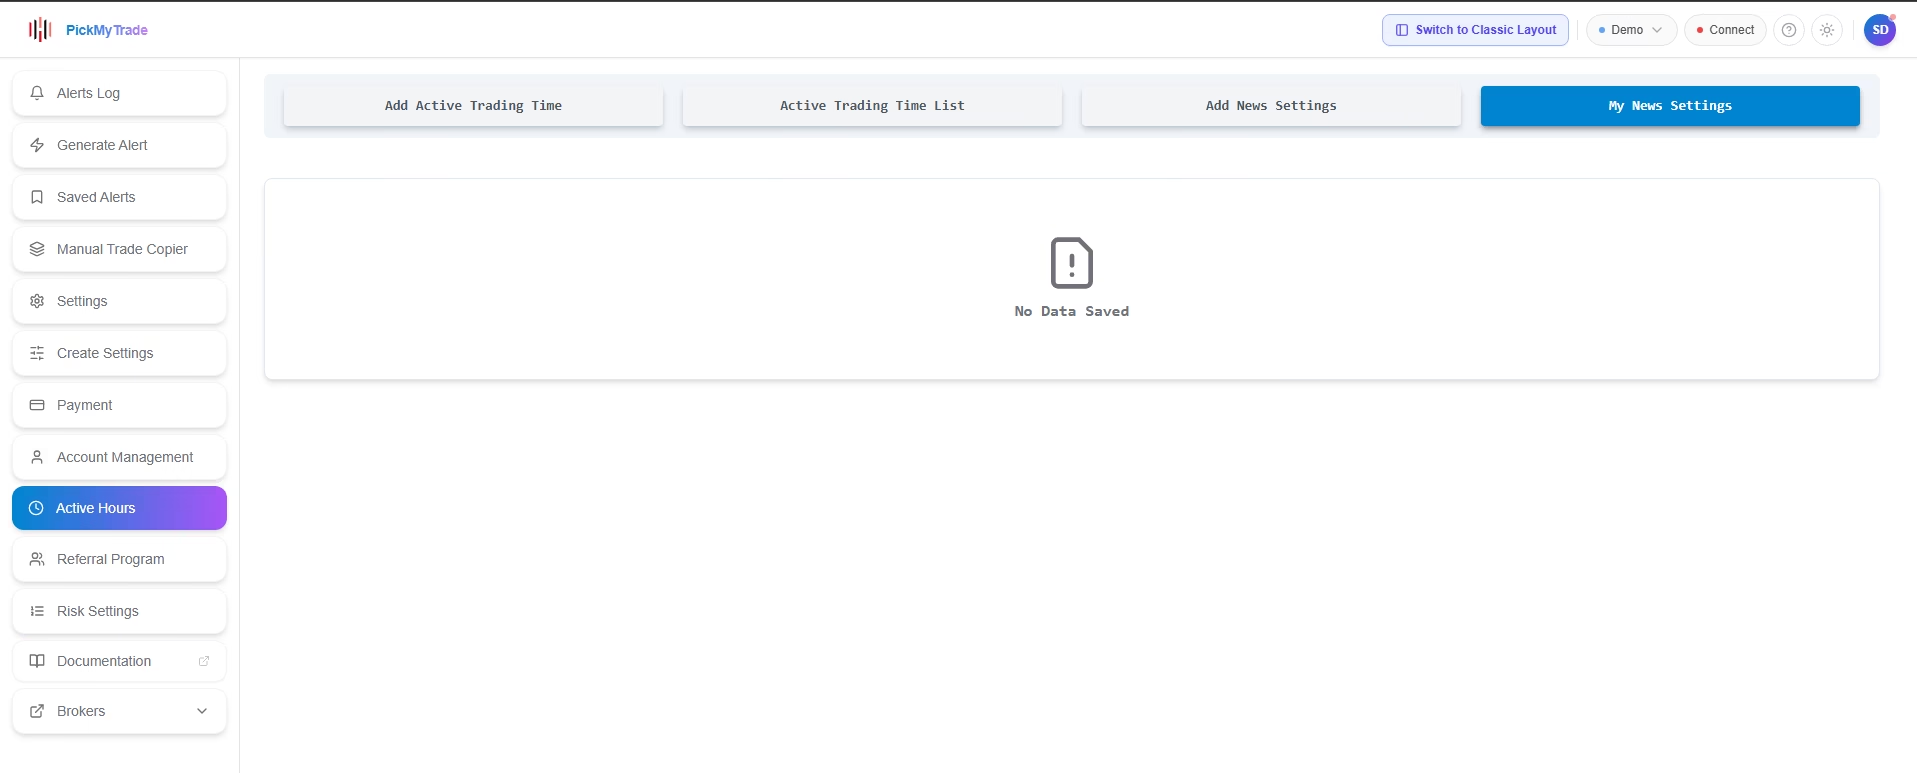
If no news filters have been configured, the My News Settings tab shows an empty state.
Further reading #
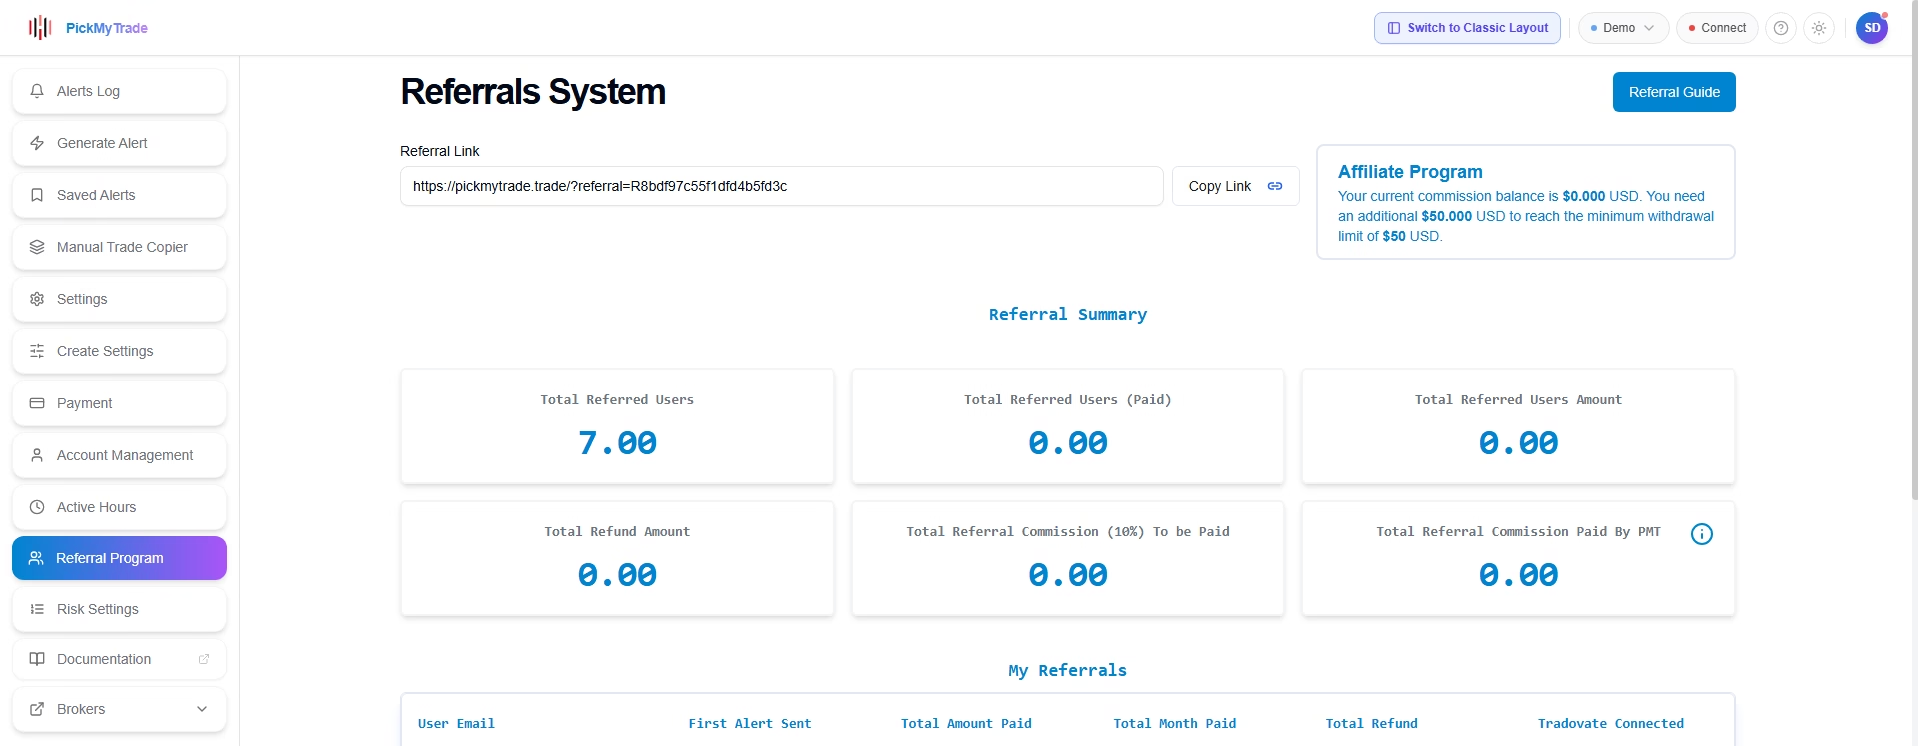
Referral Program #
The Referral Program page provides a single view for copying your referral link, reviewing your affiliate balance, and tracking referral performance. The referral link, affiliate summary, and performance metrics are displayed as distinct visual cards for clear, at-a-glance reading.
Risk Settings #
The Risk Settings page displays daily and weekly loss and profit limits at the account level. The account selector appears in the top-right corner of the page, and all limit columns are presented in a clean table layout. If no limits have been configured, the page shows an empty state with a prompt to create your first risk rule.
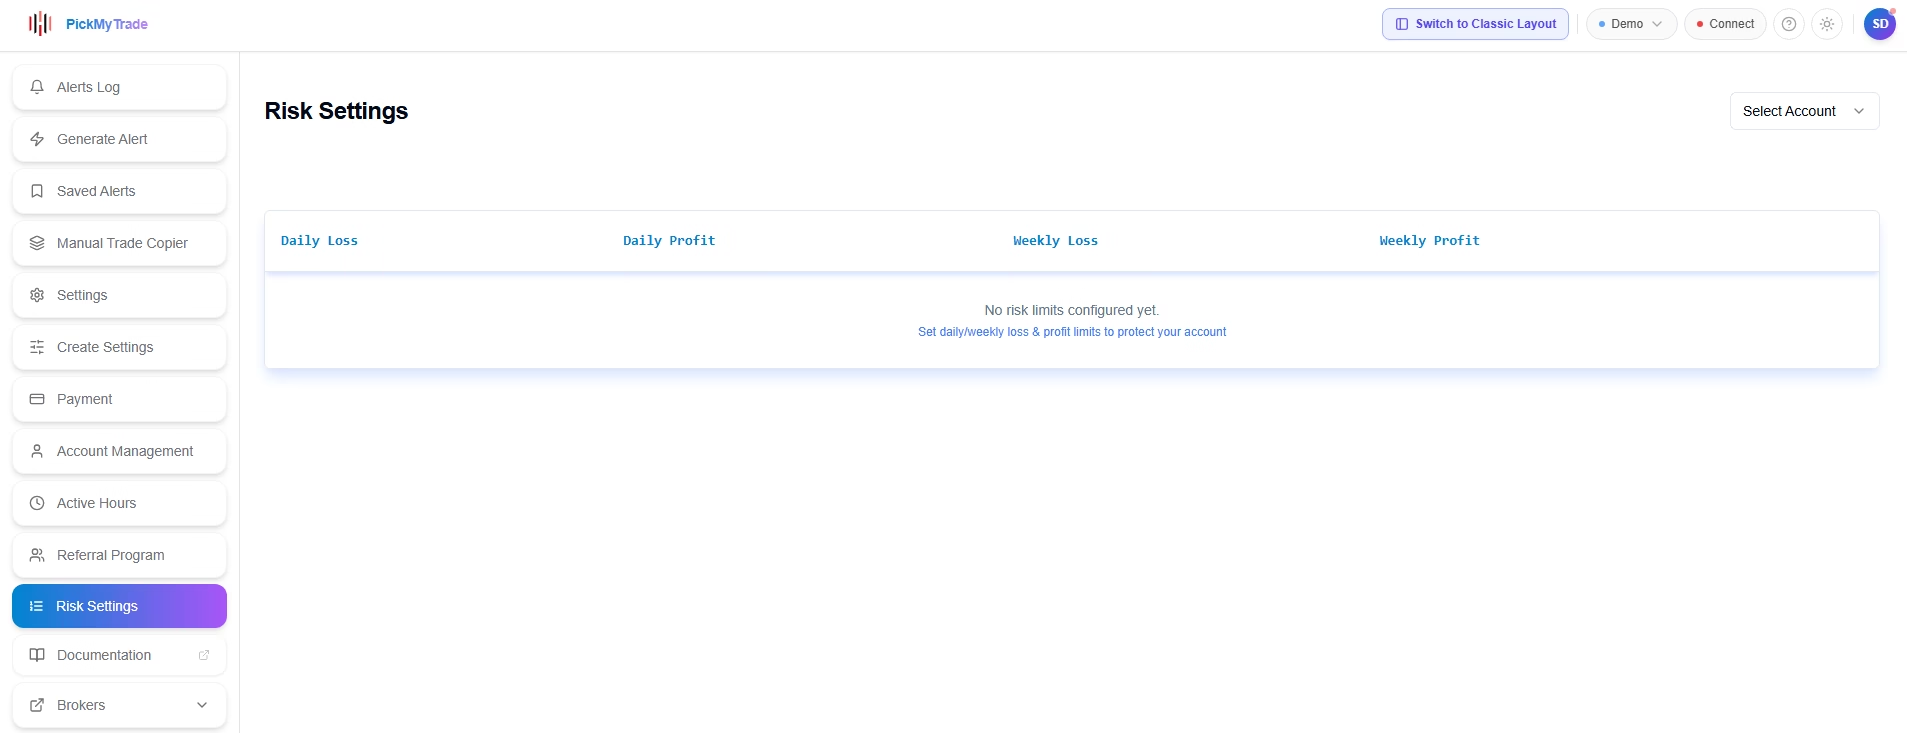
This page governs PickMyTrade-side risk management. For broker-level protections, review the Tradovate Risk Settings documentation separately.
Further reading #
Summary #
The redesigned PickMyTrade interface preserves all existing automation behavior while making the platform faster to navigate. Alert generation, account management, risk controls, and broker configuration work exactly as they did before — the layout simply presents them in a more logical, accessible structure.
Use this guide as a reference for where each feature lives in the redesigned workspace. For step-by-step configuration instructions, follow the Further Reading links within each section or browse the full PickMyTrade documentation.
FAQ’s #
The platform moved from top-tab navigation to a left sidebar layout, making it faster to access alerts, settings, accounts, copier tools, payments, and risk controls from any page. Core trading logic and automation behavior remain the same.
No. Existing TradingView alerts, webhook setups, Tradovate connections, and automation rules continue working the same way. The redesign mainly improves navigation and workflow.
Yes. The guide explains users can switch between the redesigned layout and classic layout using the available toggle inside the platform.
Last updated: May 13, 2026


