1. Introduction #
PickMyTrade lets traders automate TradingView strategies using limit orders, giving you precise control over entry price while keeping full automation with Tradovate.
With limit order automation:
- Orders are submitted at a predefined price
- Trades execute only when price reaches that level
- This approach works well for pullbacks, breakout-retests, and mean-reversion strategies
In this guide, you’ll learn how to configure a TradingView strategy to send limit orders, modify the generated JSON, and complete the webhook setup in TradingView.
2. How Limit Order Automation Works in PickMyTrade #
When you automate a TradingView strategy with limit orders:
- TradingView generates buy or sell signals
- PickMyTrade submits a LIMIT (LMT) order
- Orders stay pending until they fill or a new signal replaces them
As a result, you maintain control over entry price without losing automation.
Key Requirements #
To ensure proper execution, your setup must meet the following requirements:
- The strategy must generate entry signals
- The order quantity must be fixed
- The alert JSON must include a limit price
- Market position must be tracked correctly to allow reversals
3. Step-by-Step Setup in PickMyTrade #
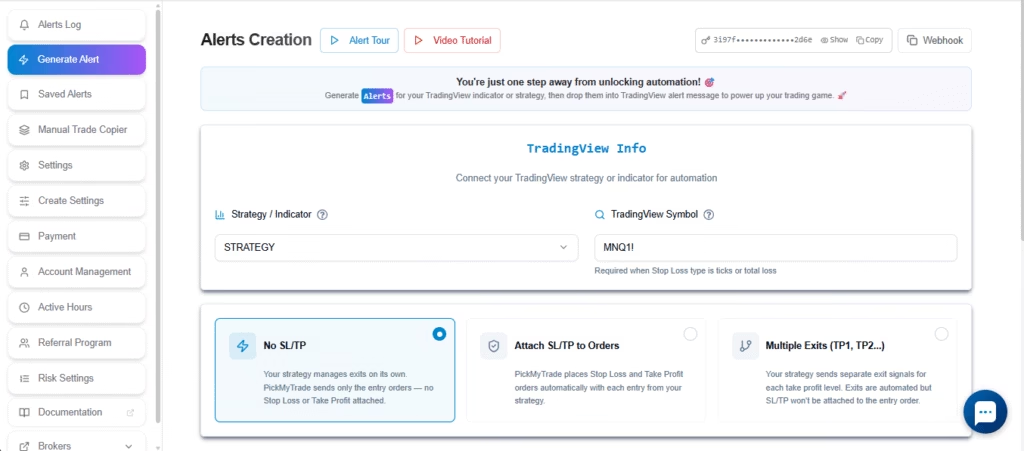
Step 1: Generate the Alert in PickMyTrade #
- Log in to PickMyTrade
- Go to Generate Alert
- Select TradingView Strategy
- Enter your TradingView symbol (for example,
MNQ1!) - Click Generate Alert
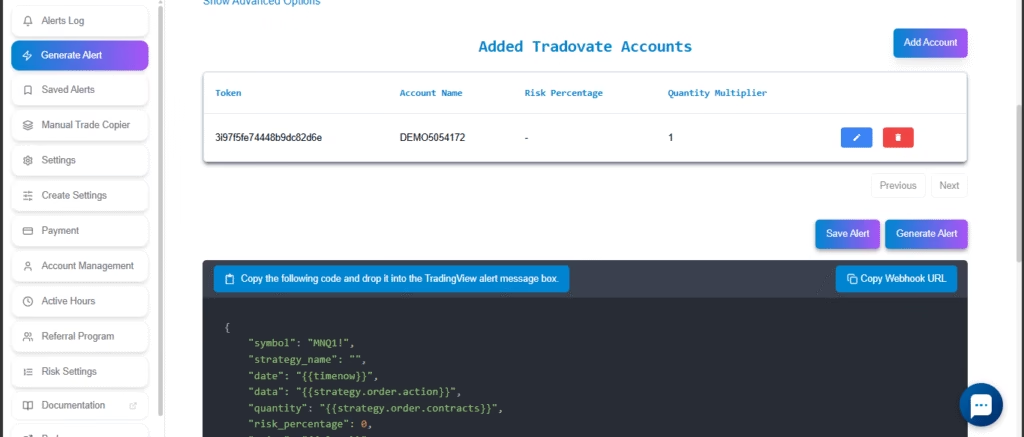
Step 2: Copy the Generated JSON #
Next, click Copy and paste the JSON into a text editor such as Notepad++, VS Code, or Notepad. This allows you to safely edit the message before using it in TradingView.
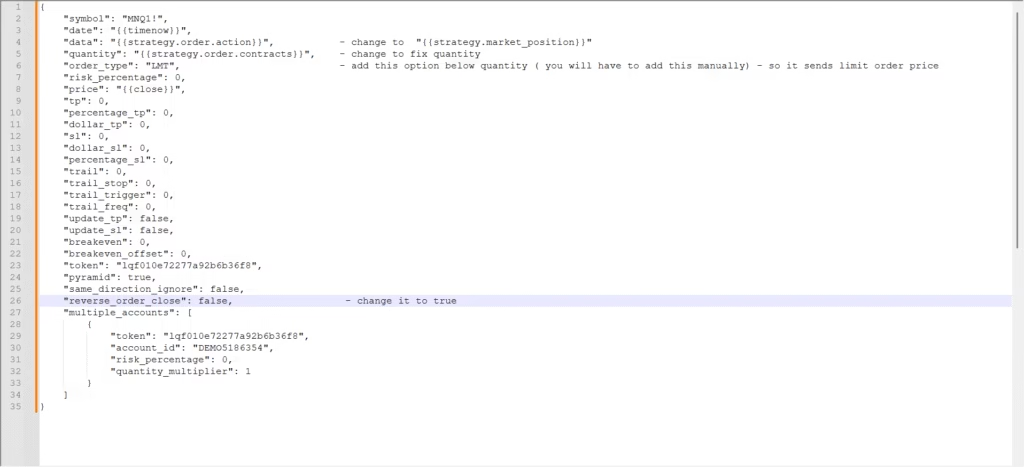
Step 3: Modify the JSON for Limit Orders #
Make the following required changes to the generated JSON.
| # | Field Name | Action | Value |
|---|---|---|---|
| 1 | data | Replace | from {{strategy.order.action}} to {{strategy.market_position}} |
| 2 | quantity | Set | 2 |
| 3 | order_type | Add | "LMT" |
| 4 | reverse_order_close | Set | true |
Make the following required changes to the generated JSON before using it in TradingView.
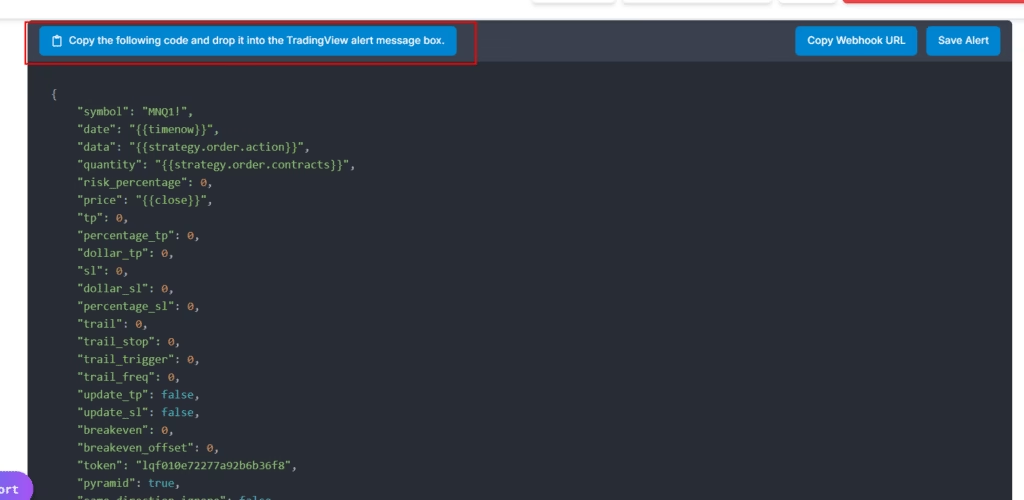
Final JSON for Limit Orders #
{
  "symbol": "MNQ1!",
  "date": "{{timenow}}",
  "data": "{{strategy.market_position}}",
  "quantity": 4,
  "order_type": "LMT",
  "risk_percentage": 0,
  "price": "{{close}}",
  "tp": 0,
  "percentage_tp": 0,
  "dollar_tp": 0,
  "sl": 0,
  "dollar_sl": 0,
  "percentage_sl": 0,
  "trail": 0,
  "trail_stop": 0,
  "trail_trigger": 0,
  "trail_freq": 0,
  "update_tp": false,
  "update_sl": false,
  "breakeven": 0,
  "breakeven_offset": 0,
  "token": "lqf****",
  "pyramid": true,
  "same_direction_ignore": false,
  "reverse_order_close": true,
  "multiple_accounts": [
    {
      "token": "lq****",
      "account_id": "DEMO****",
      "risk_percentage": 0,
      "quantity_multiplier": 1
    }
  ]
}
GTD Orders (Tradovate) #
Known Issue: Tradovate has confirmed a platform-side issue where time-based GTD expiration may not work correctly. As a result, orders using gtd_in_second or GTD expiration may remain active past their intended expiry time.
Tradovate has acknowledged the issue and is working on a fix. Until then, please monitor GTD orders manually.
5. Configure TradingView Webhook and Alert #
Create the TradingView Alert #
- Open the TradingView strategy on your chart
- Click Create Alert
- Select Strategy → Order fills
- Enable Webhook URL
- Paste the Webhook URL generated in PickMyTrade
- Paste the modified JSON into the alert message body
- Click Save to activate the alert
For detailed, step-by-step instructions with screenshots, refer to the following guide:
https://docs.pickmytrade.trade/docs/configuring-tradingview-alerts/
FAQ’s #
A limit order lets you define the exact price where you want to enter a trade. Tradovate keeps the order pending until price reaches that level or conditions change.
You need to modify the generated JSON by setting order_type to "LMT", adding a price field, fixed quantity, and enabling reversal settings if needed.
The order stays pending until it fills, expires, or a new signal replaces it based on your configuration.
Yes. Create a TradingView alert, enable webhook URL, paste the PickMyTrade webhook, and use the edited JSON message body.
Last updated: June 17, 2026


